Set up Google OAuth with Omni
This covers setting up an SSO connection with your Google app. The general process will be:- Creating an OAuth Client ID in Google
- Verifying your Google account domain
- Configuring the application with your OmniAI callback url
1. Create a new project
From the Google Console, create a new project.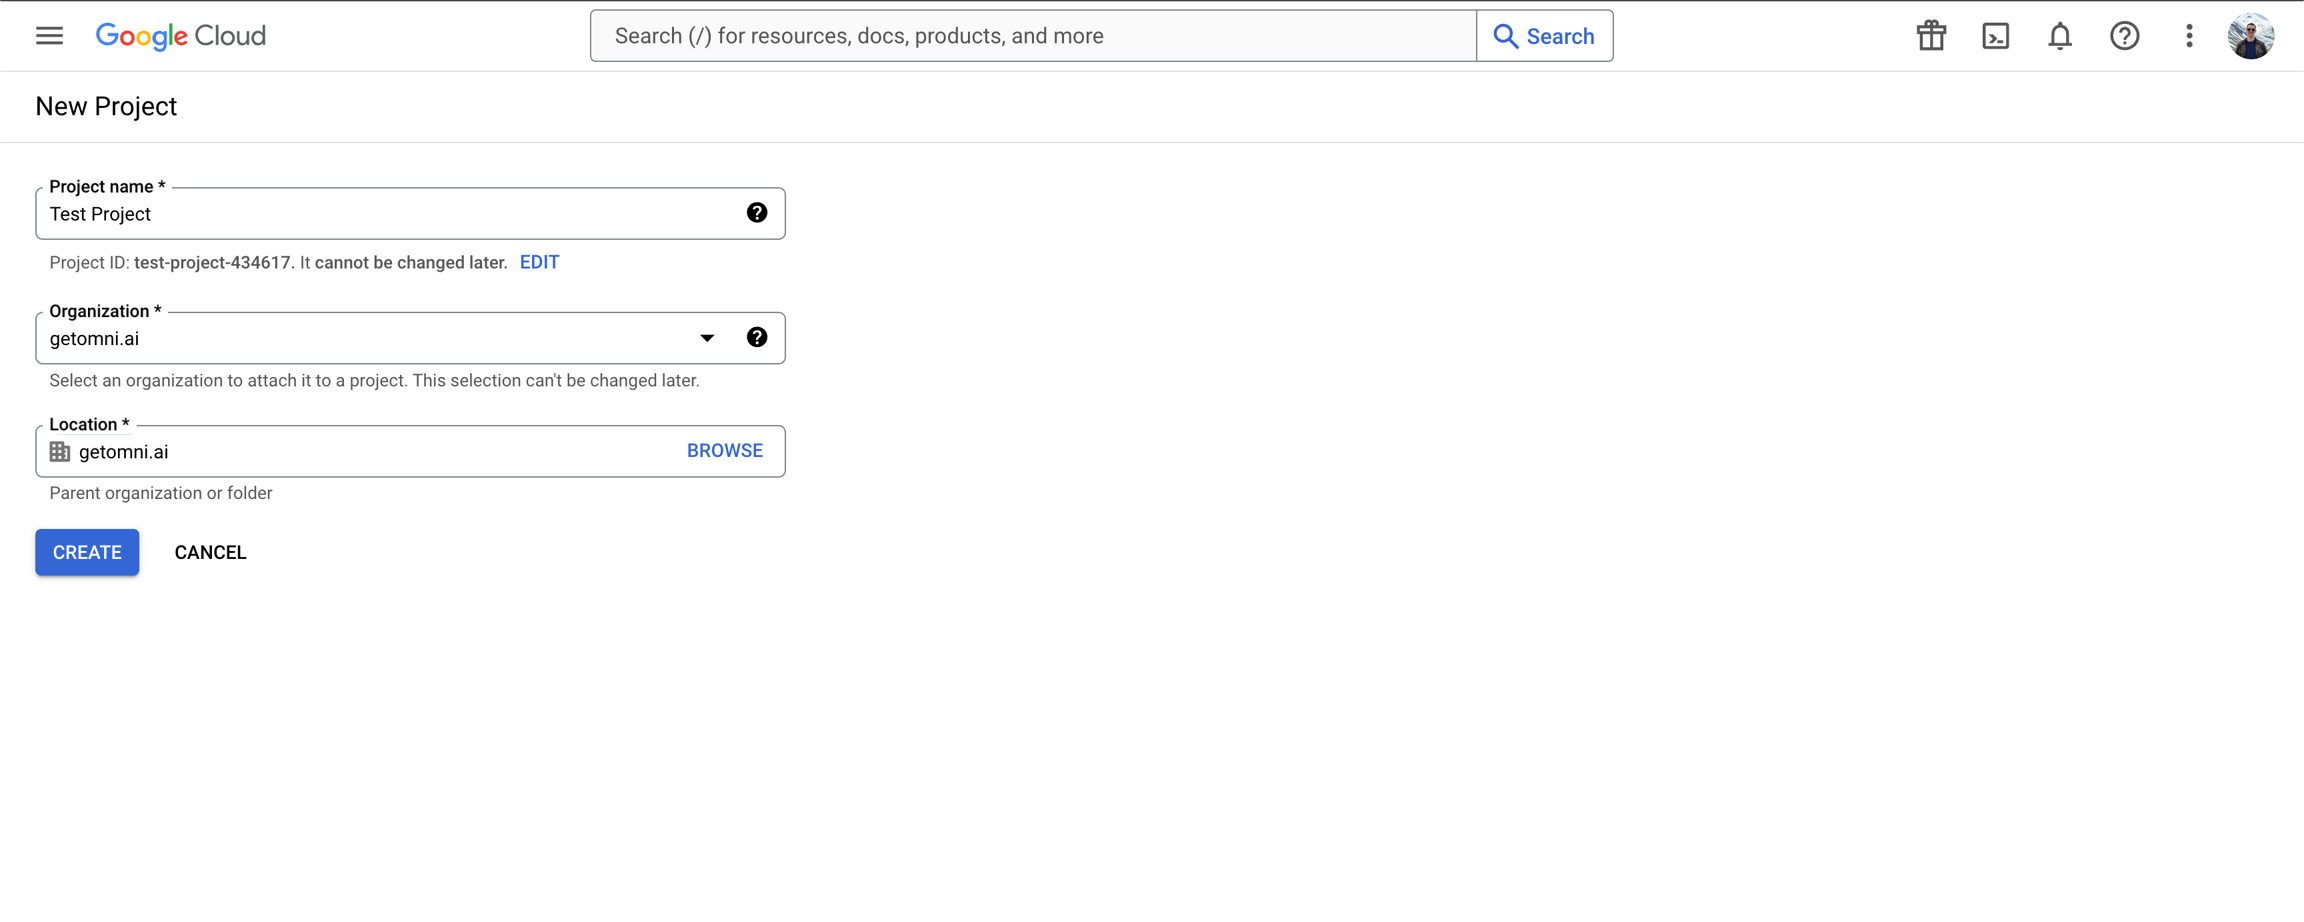
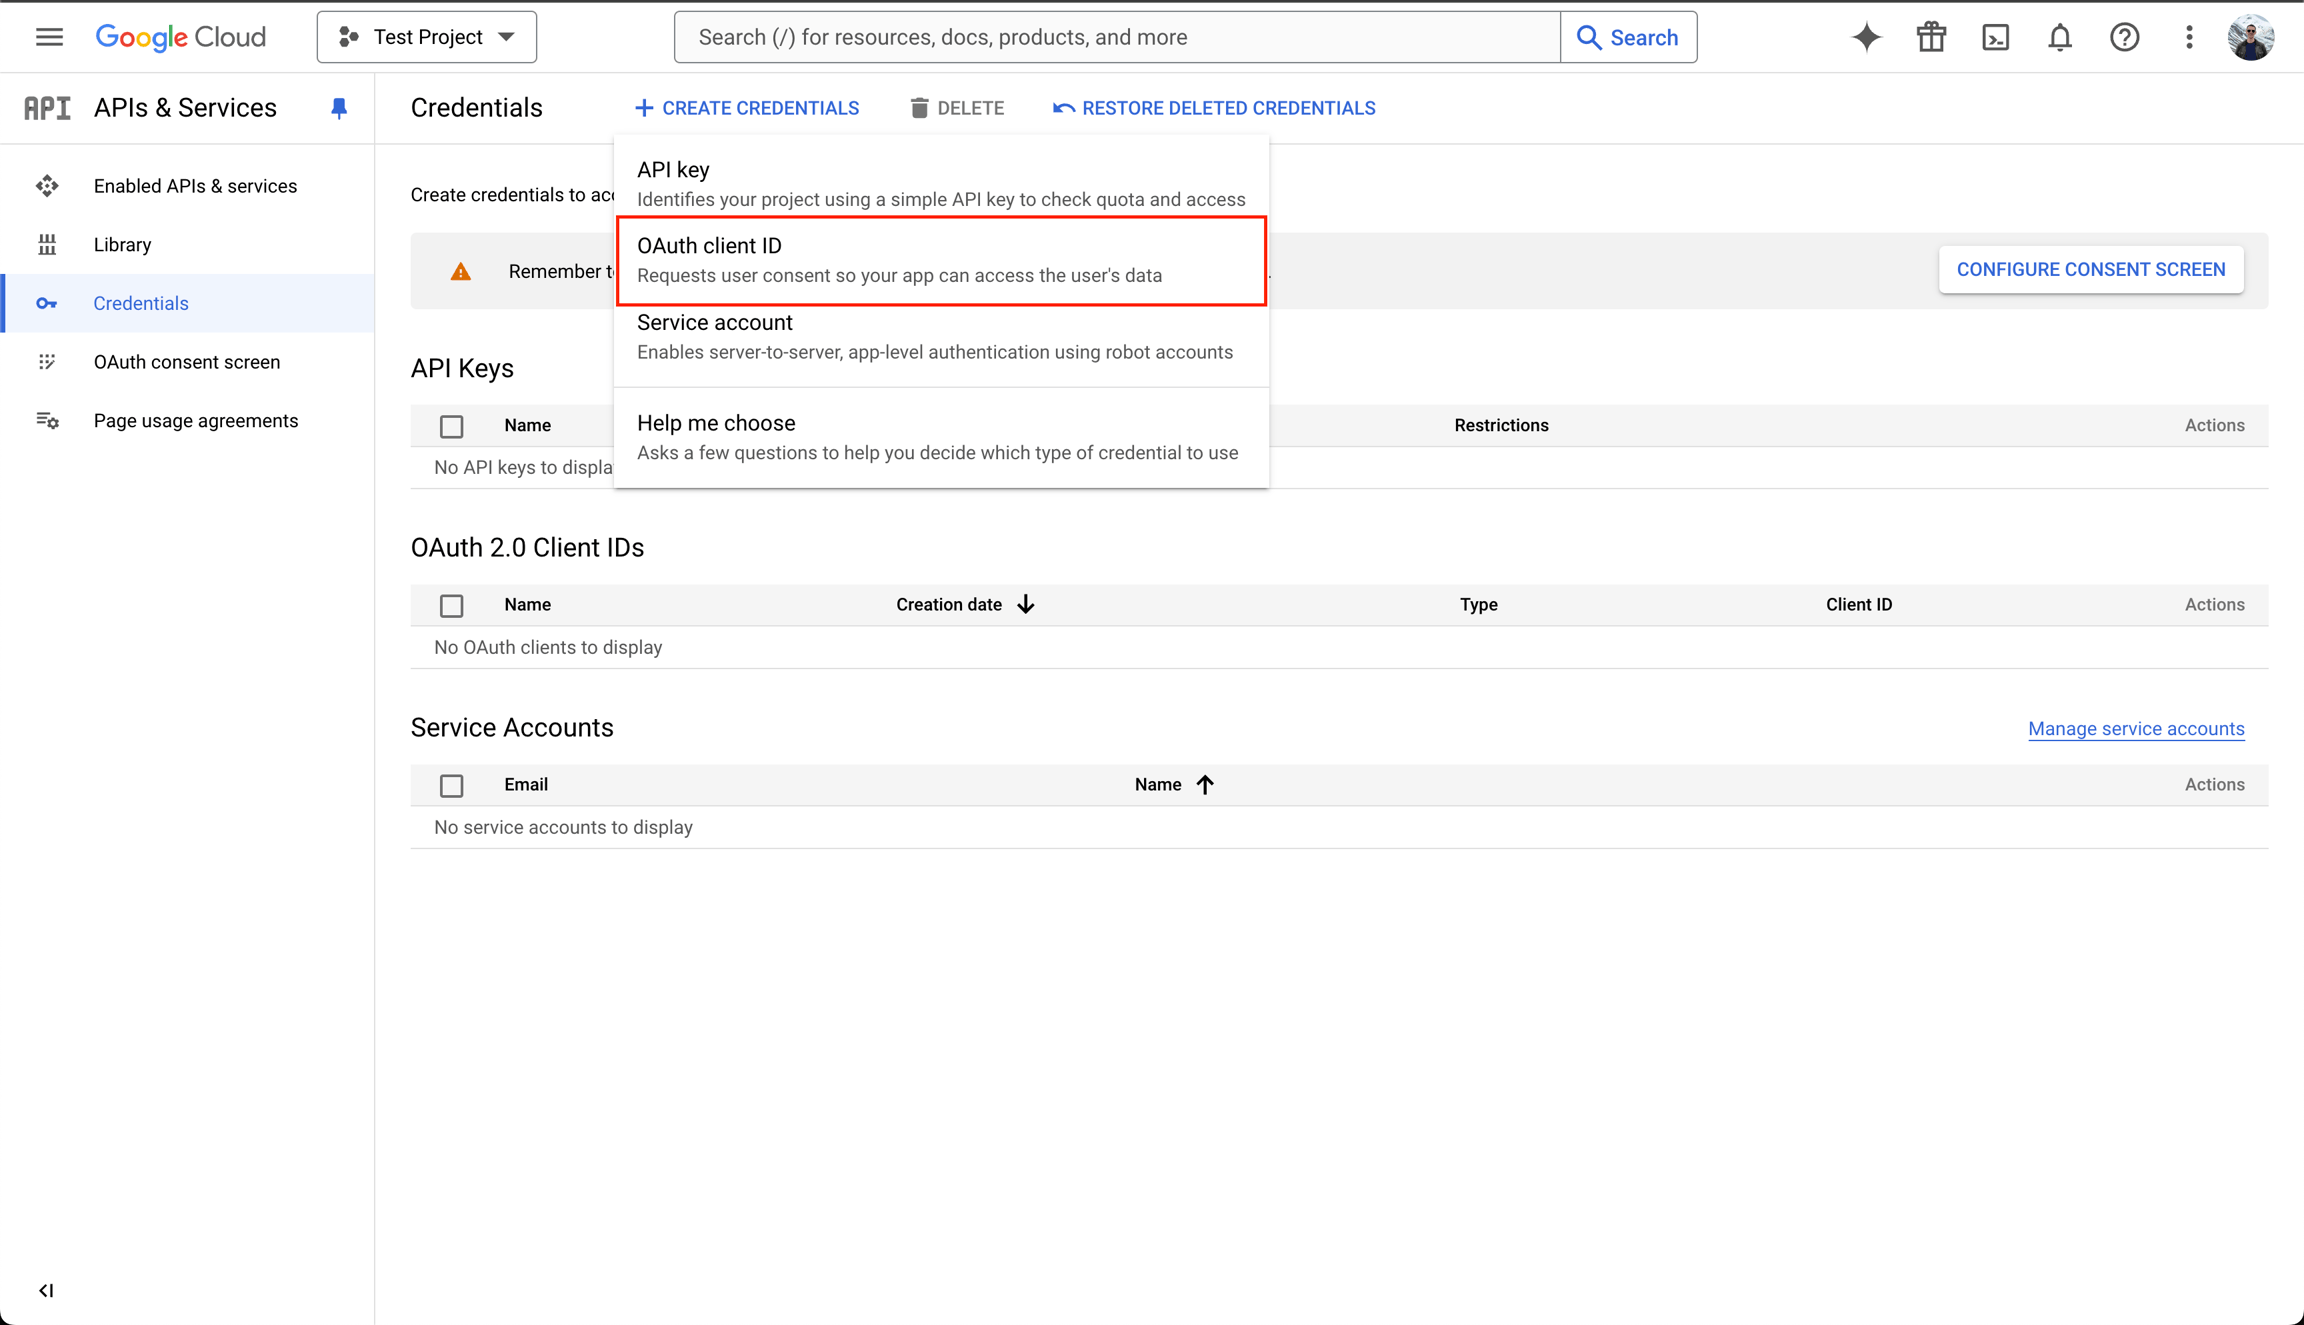
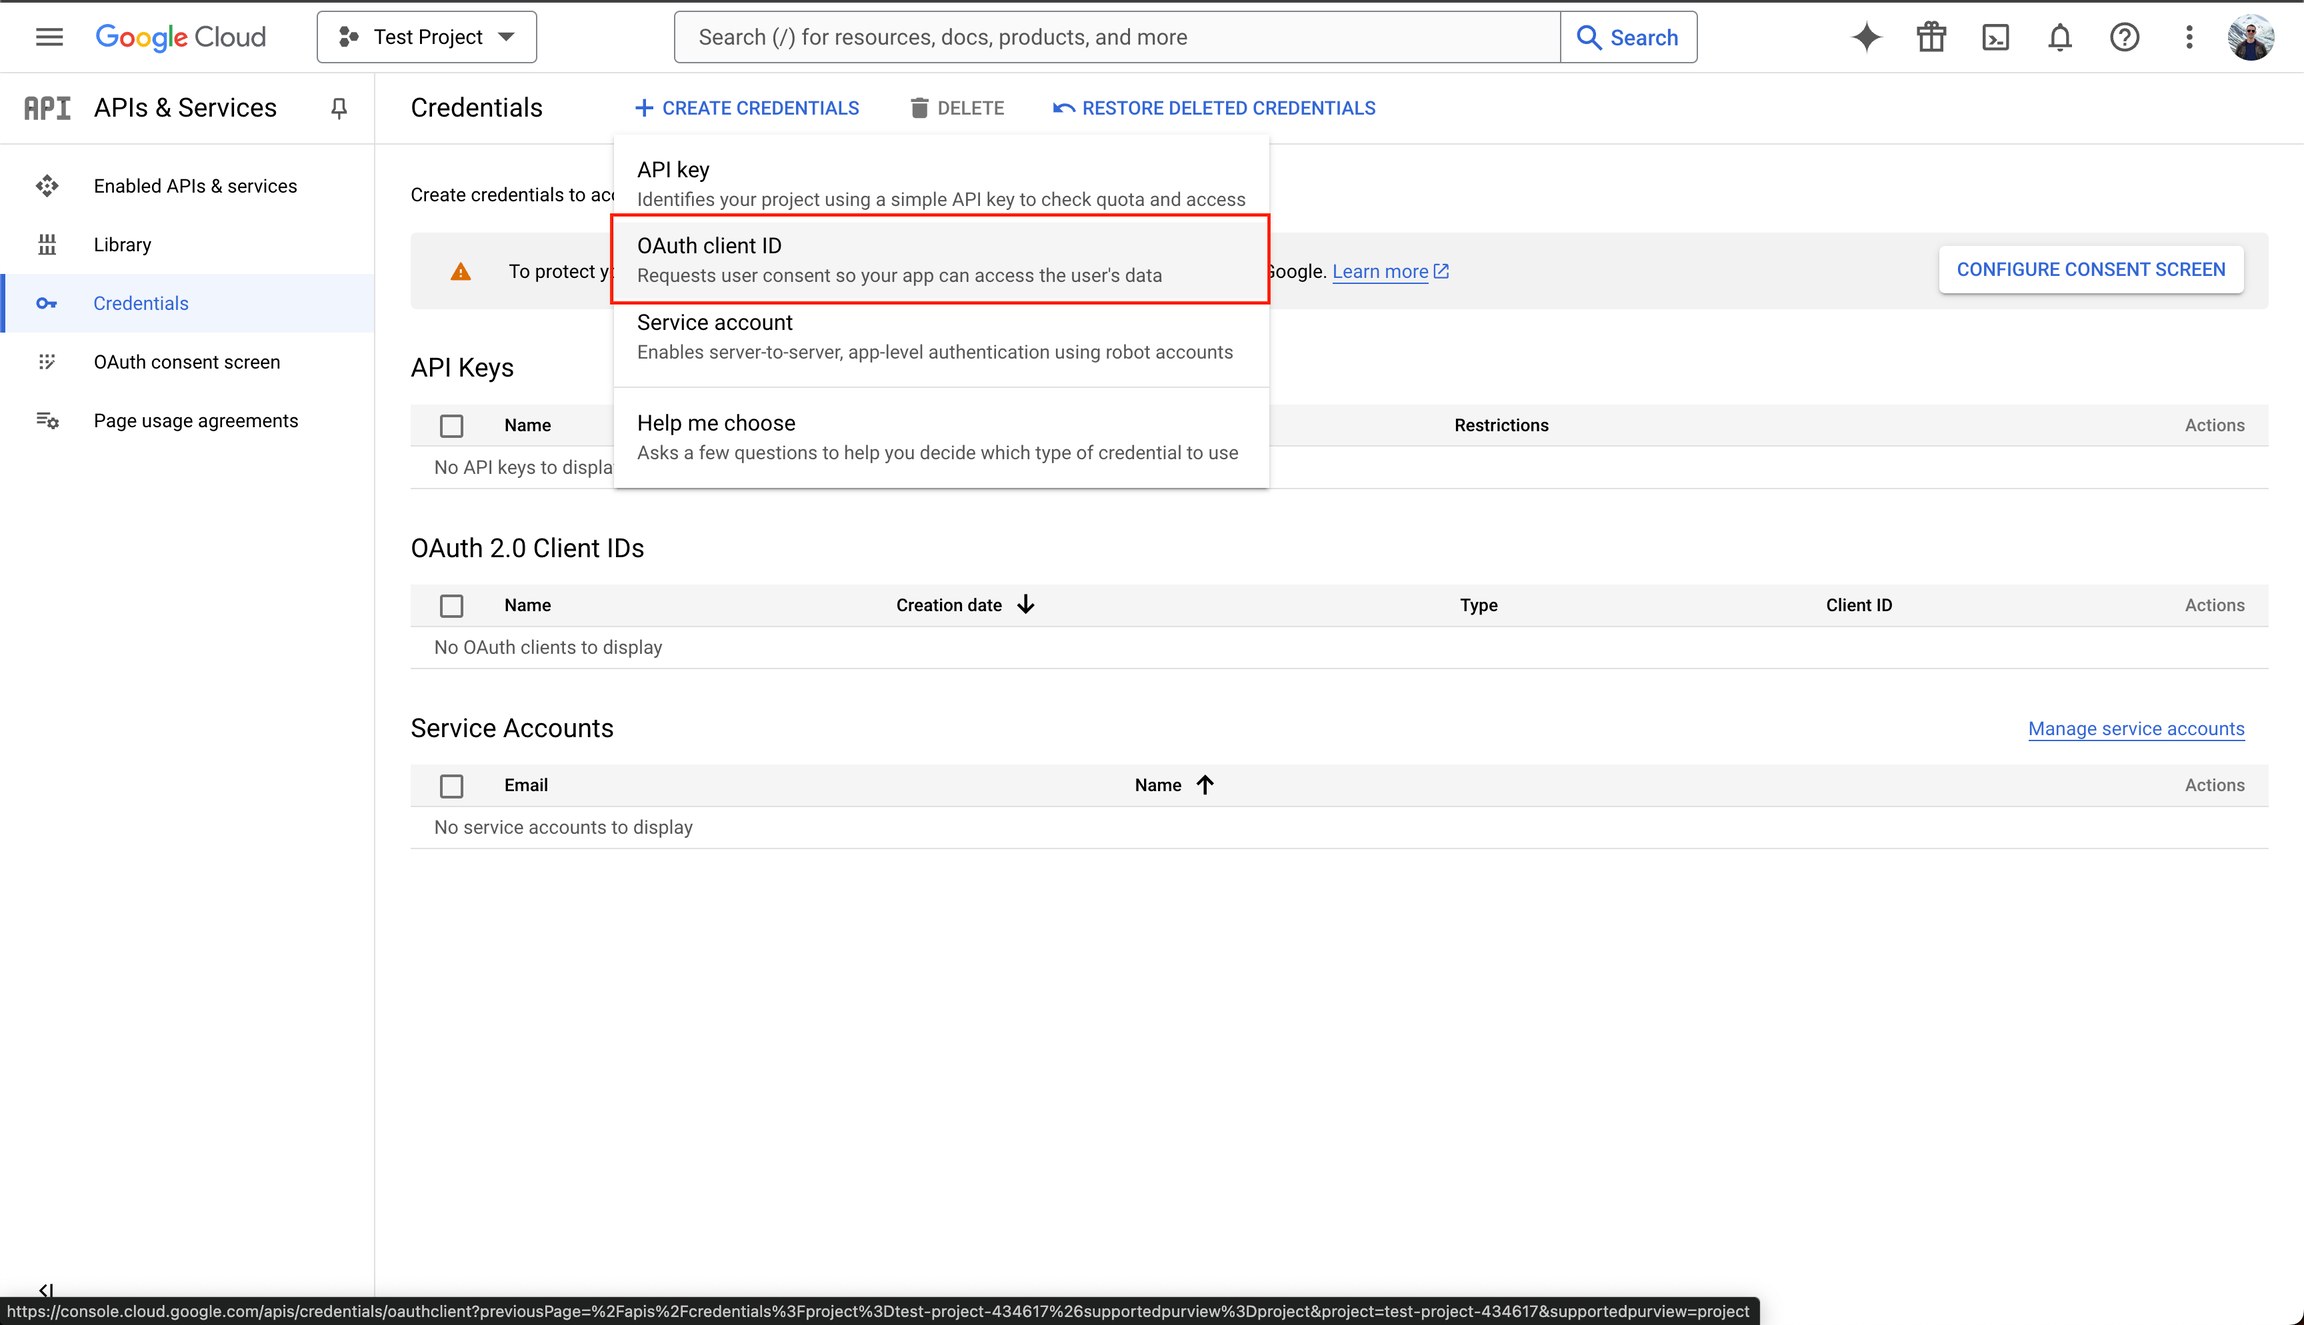
2. Create an Oauth ID
Under theCreate Credentials section, create a new Oauth Client ID.
3. Configure consent screen
Click “Configure Consent Screen” and create an External app.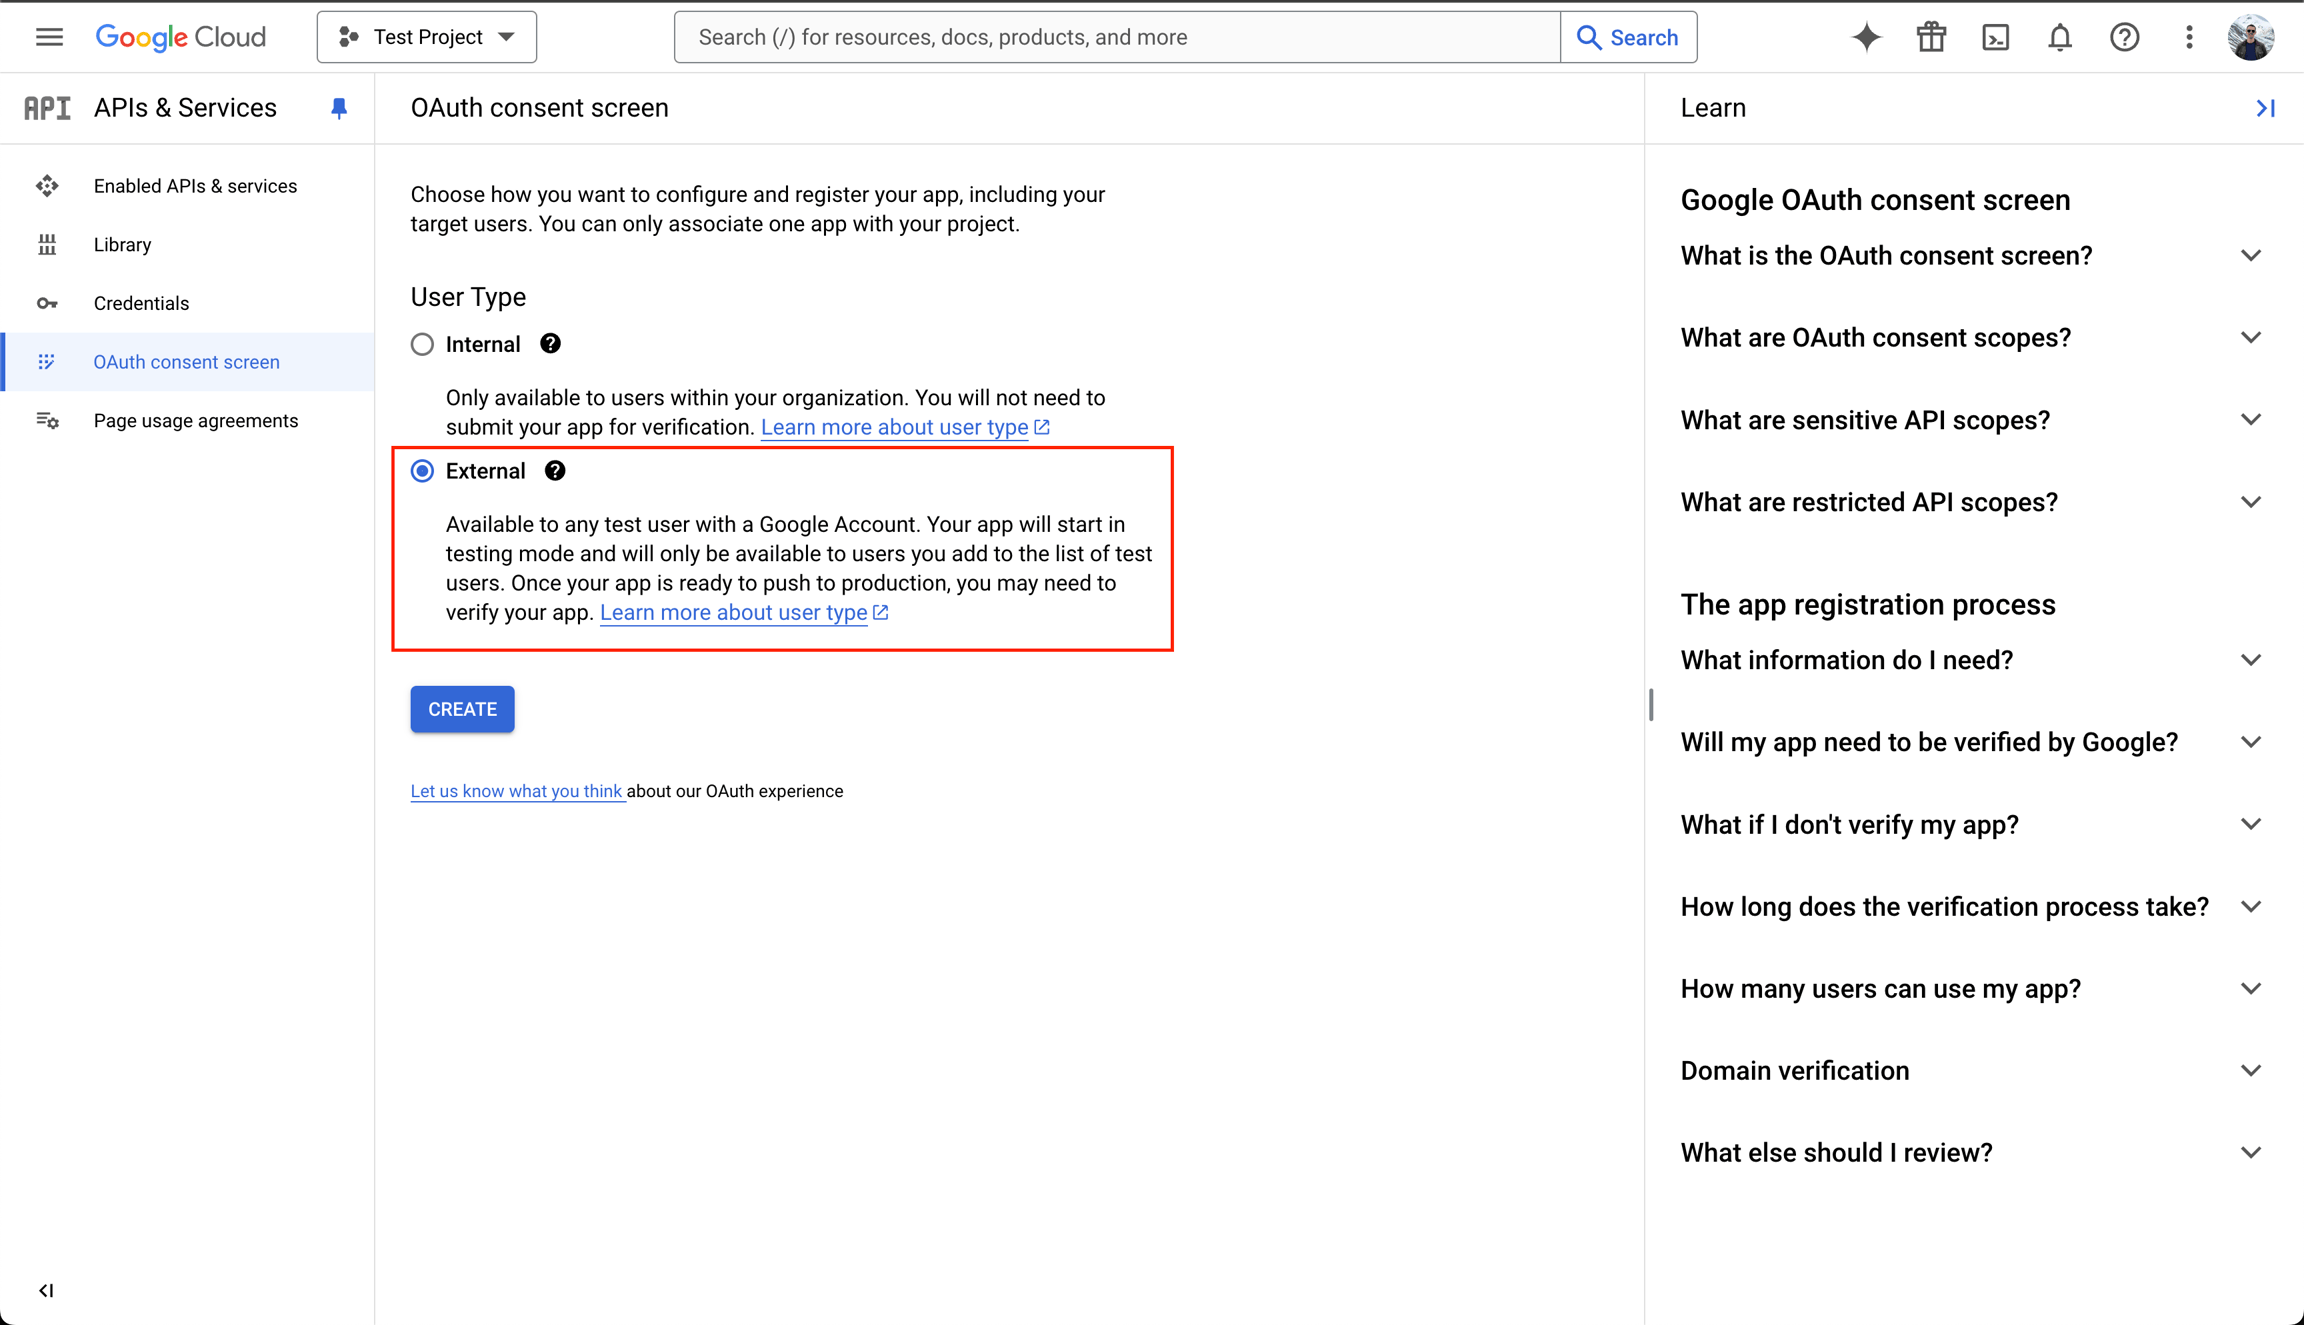
4. Configure app details
Configure the app details.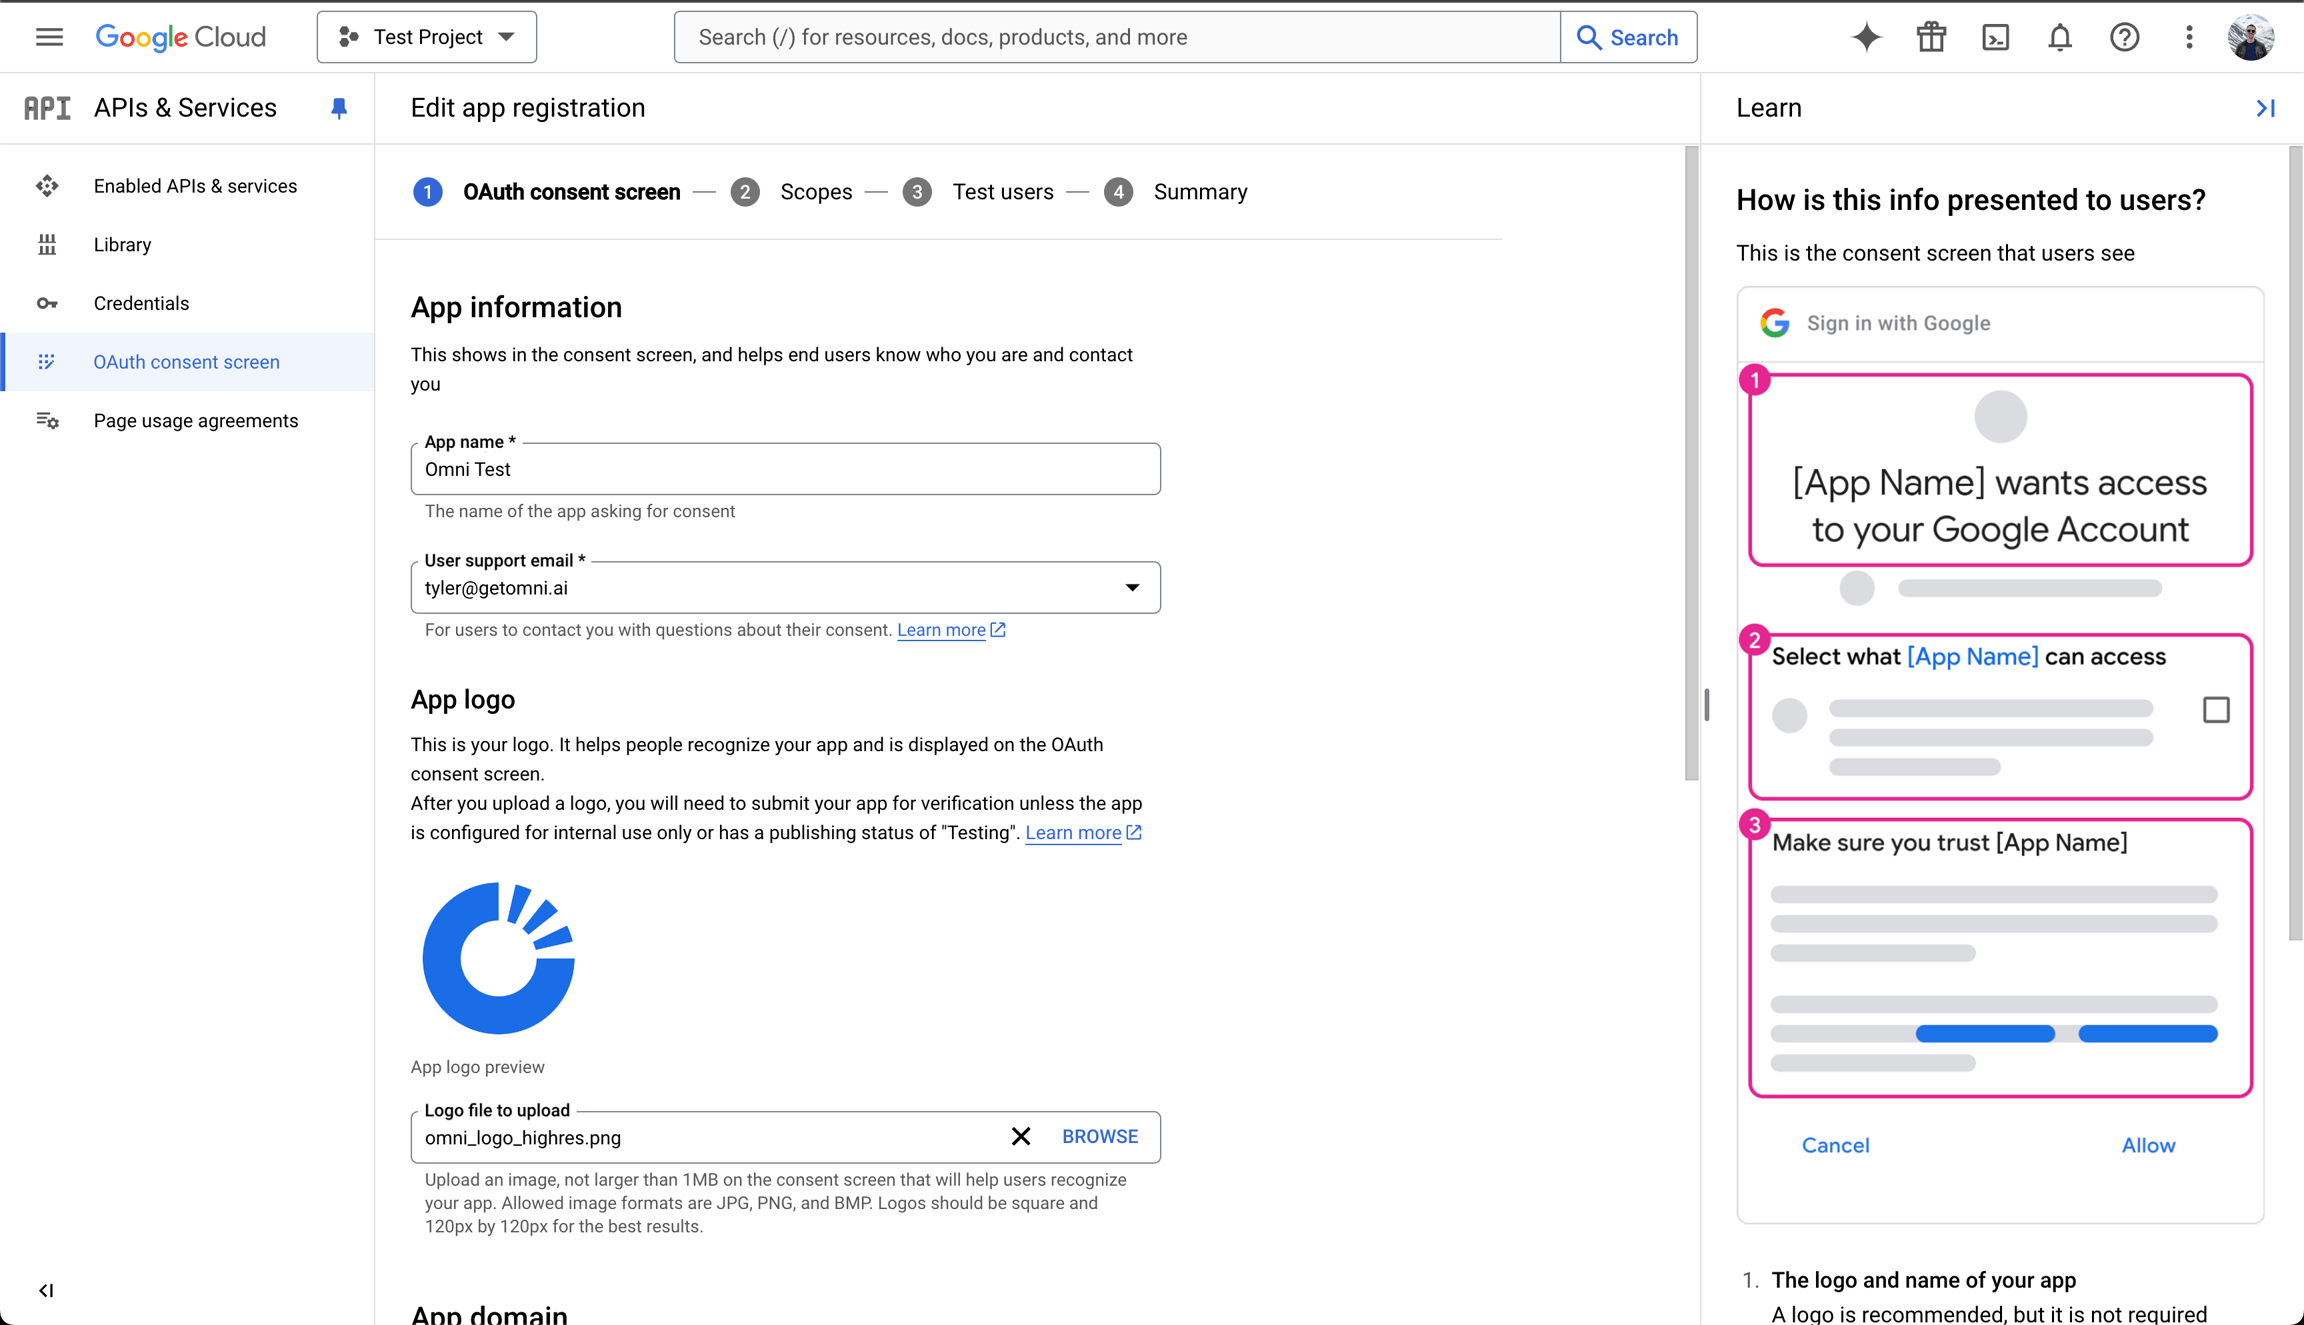
5. Authorize a Domain
Authorize a domain to use the OmniAI callback url.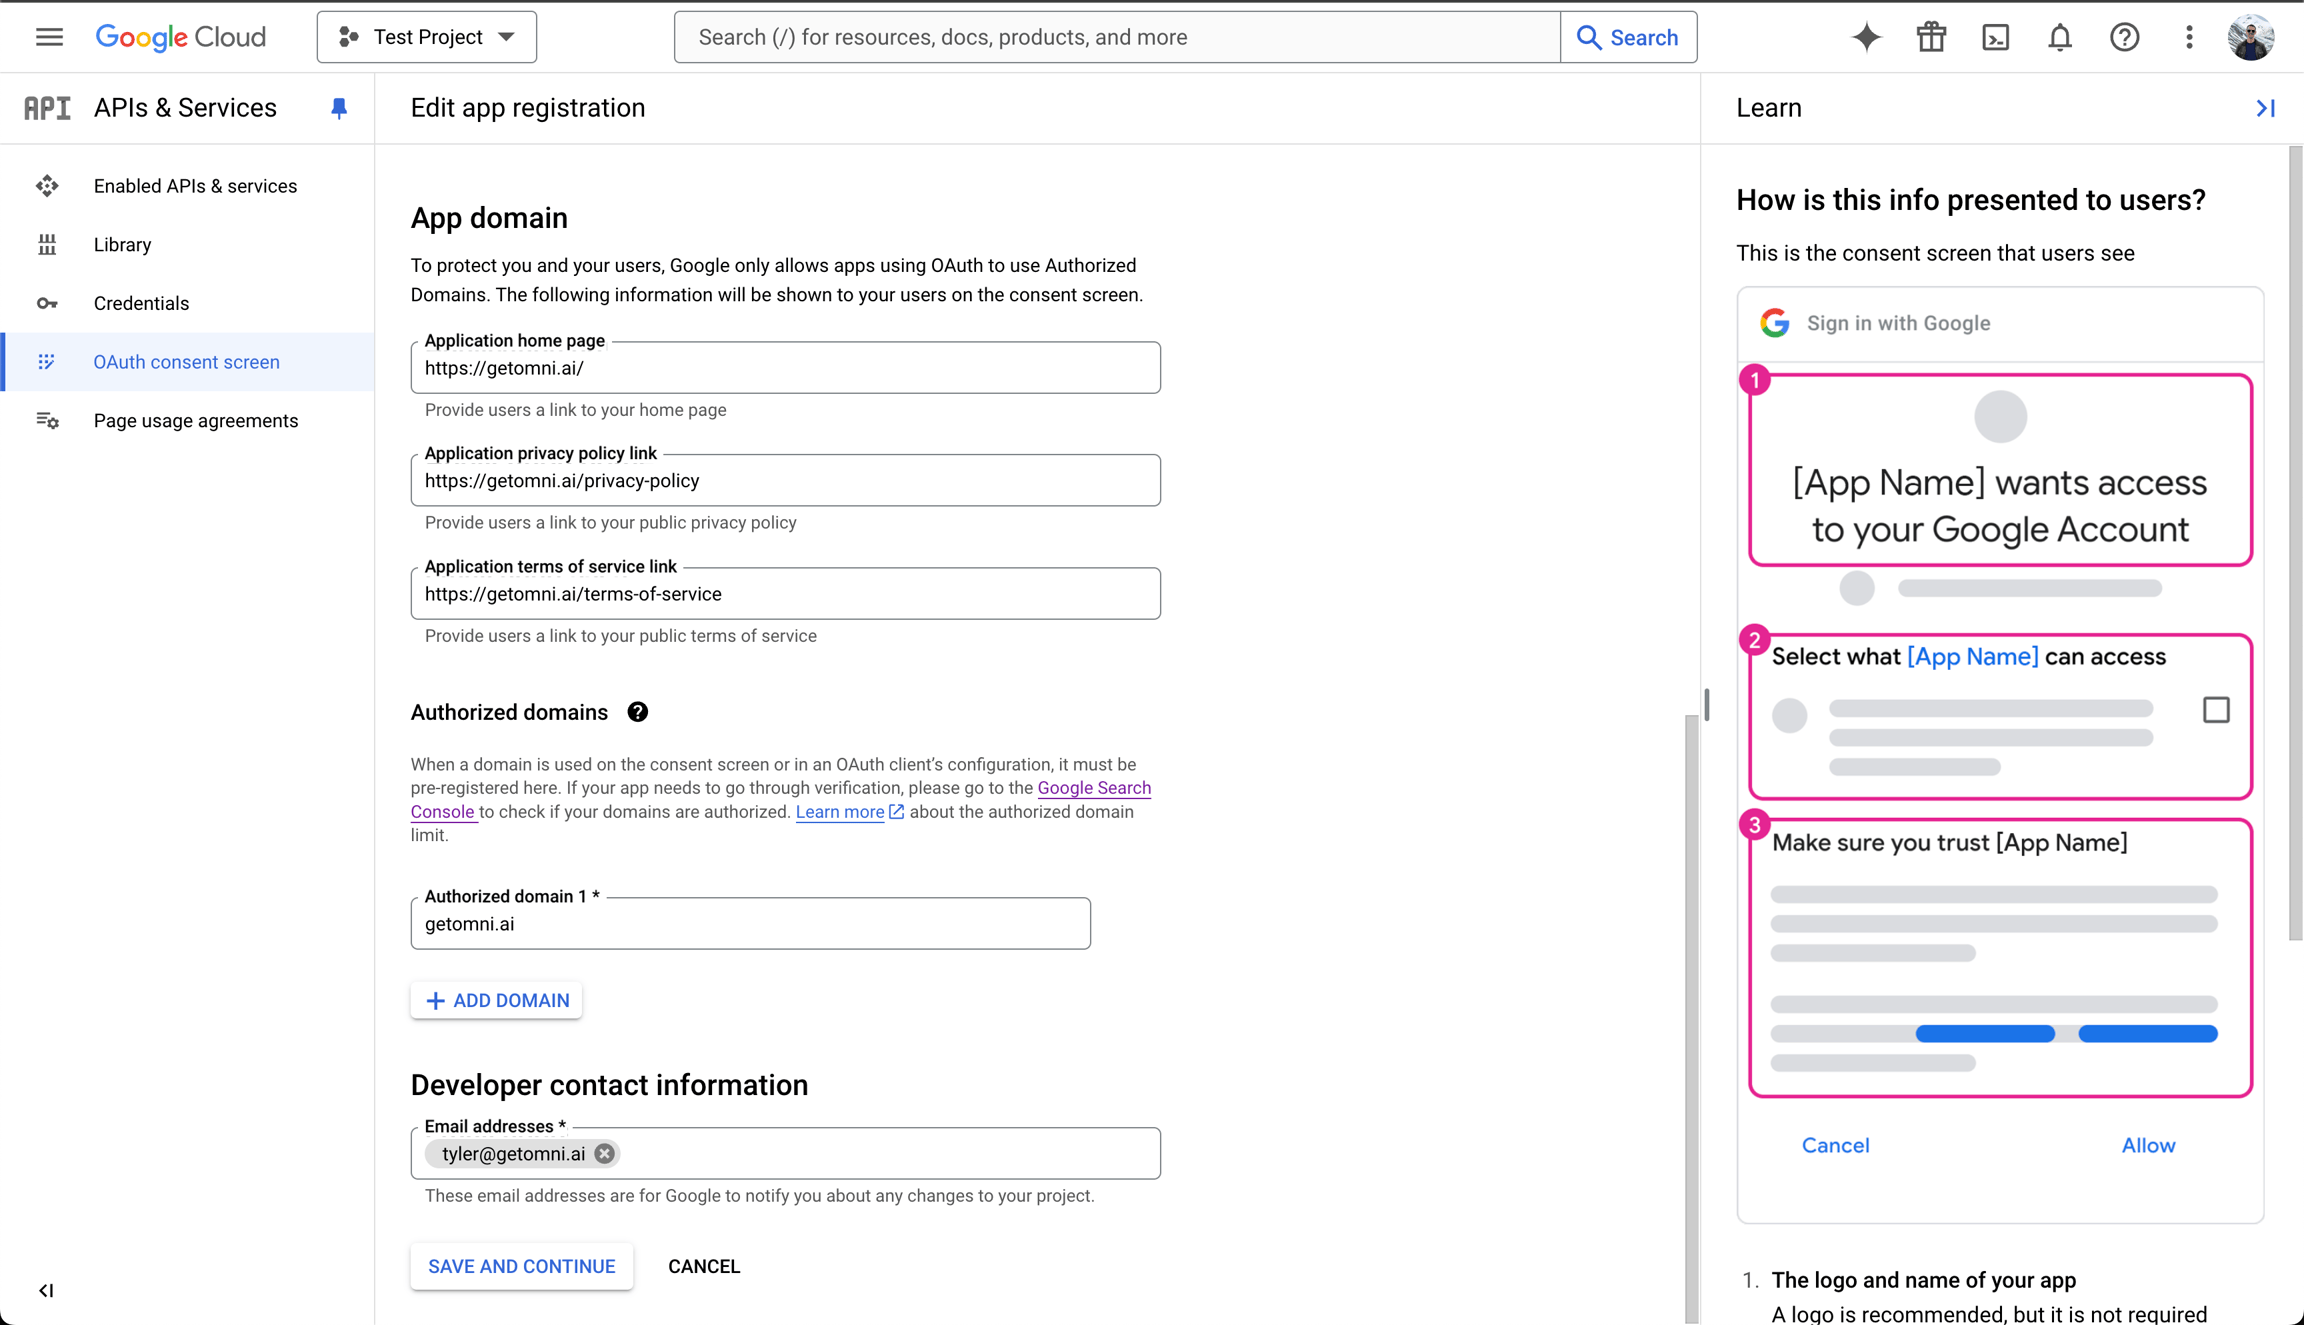
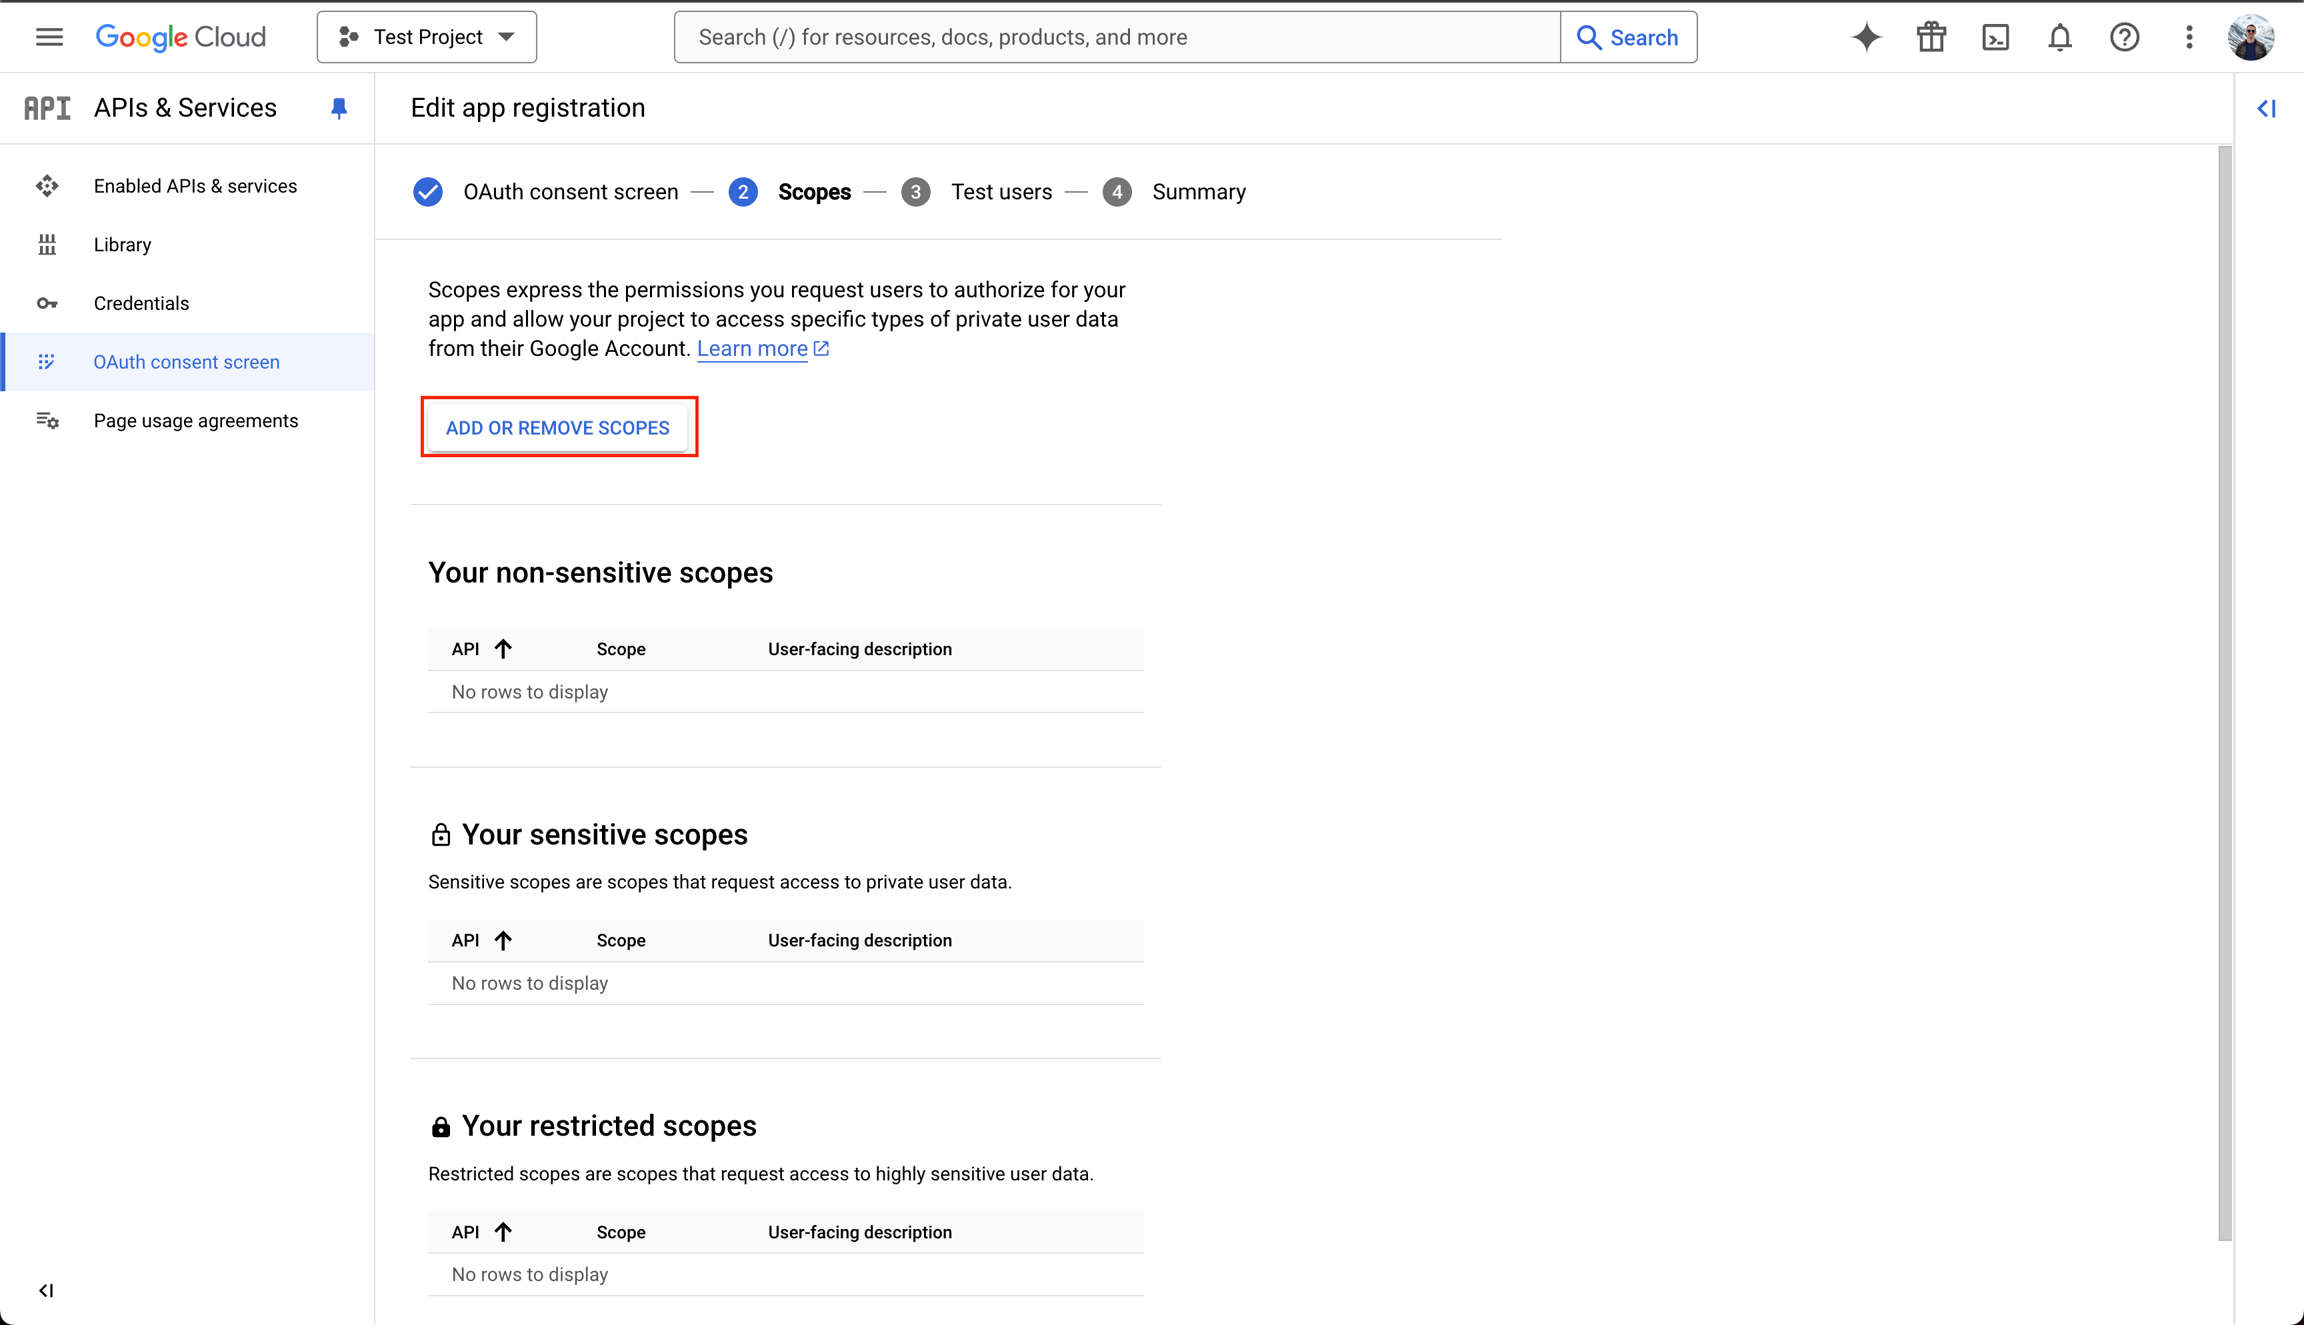
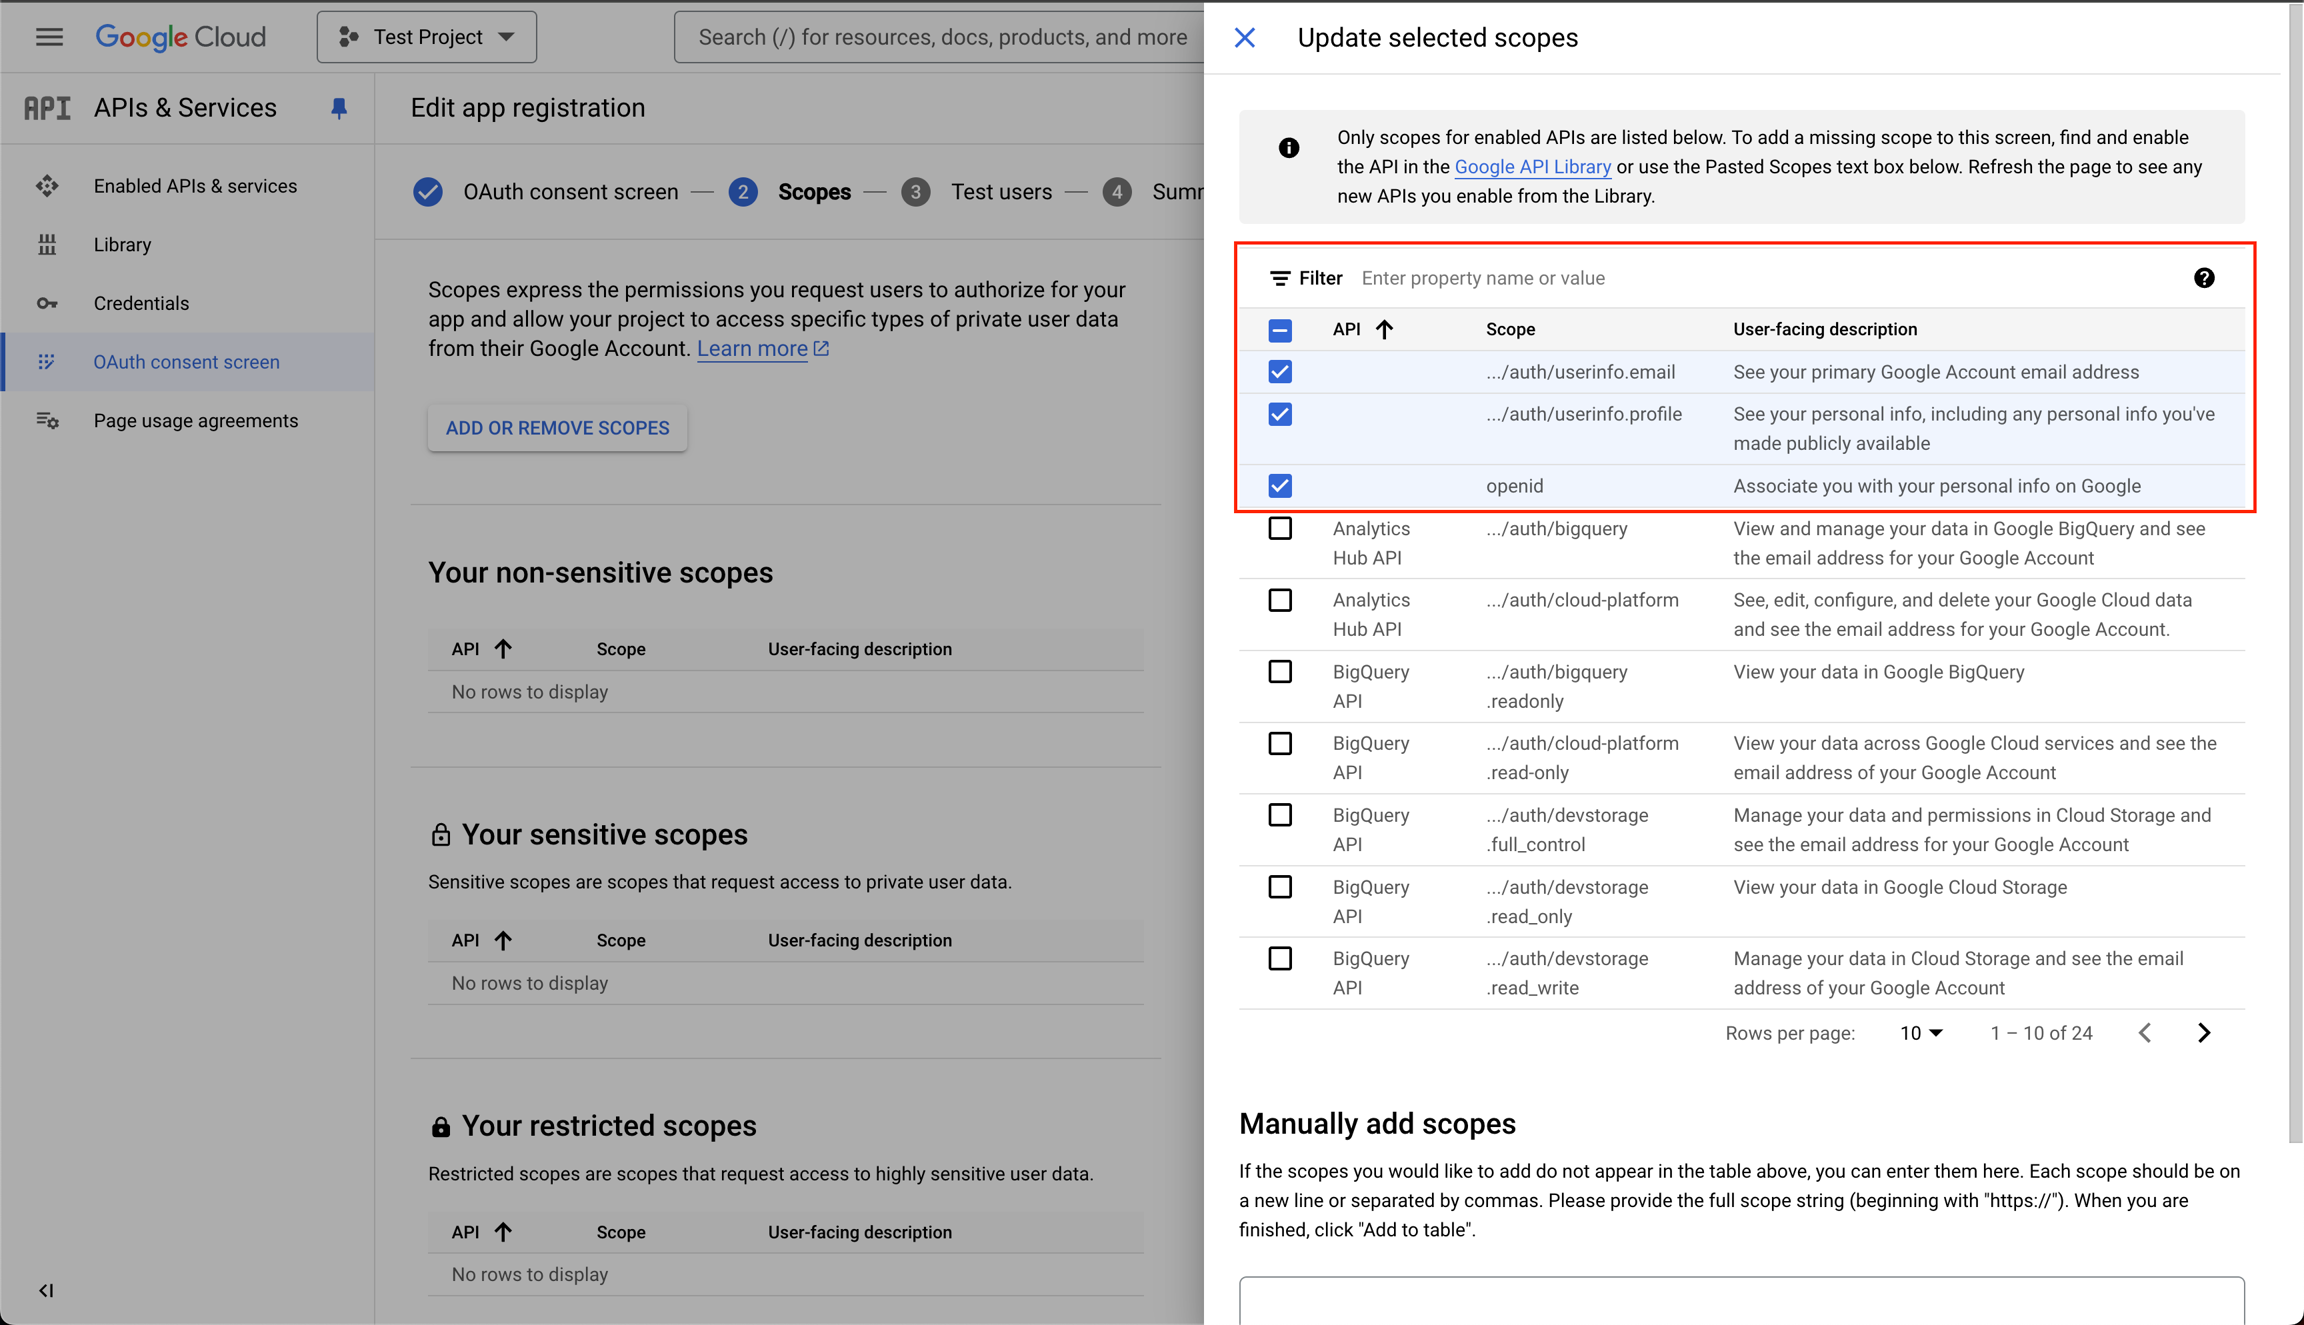
6. Add permission scope
For the Omni authentication, we will just need the top level public permissions./auth/userinfo.email/auth/userinfo.profileopenid
7. Optional: Add test users
Add test users to the OmniAI application.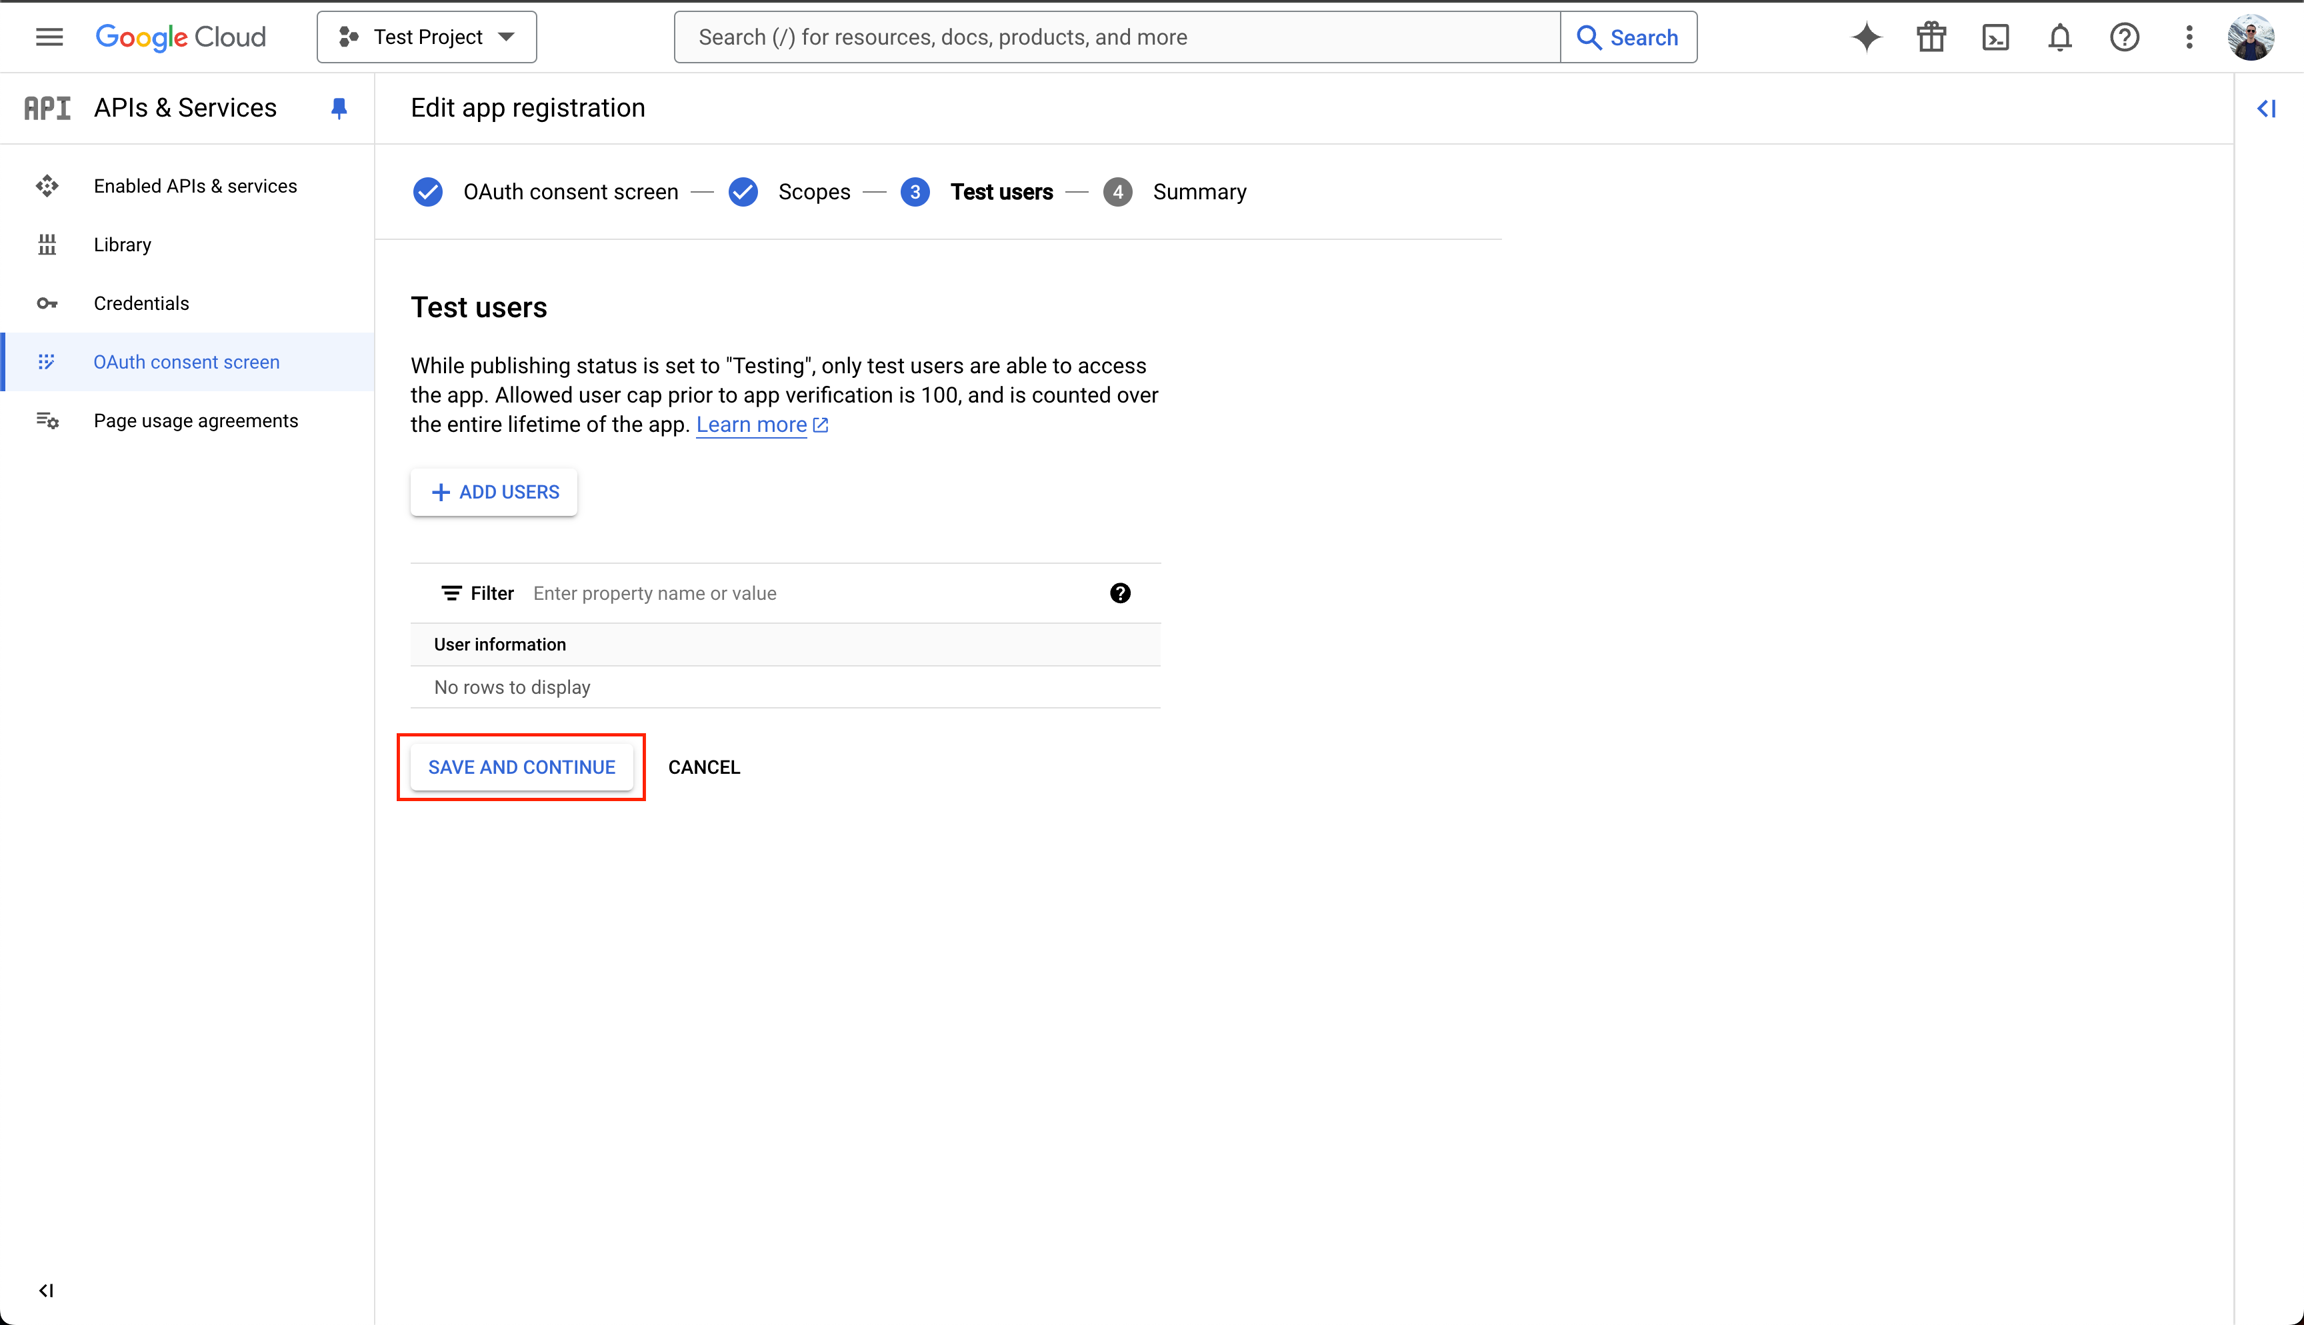
8. Complete Registration
App registration is now complete. Scroll to the bottom and click “Back to Dashboard”
9. Publish App
From the dashboard you can click into your newly created app and click “Publish App”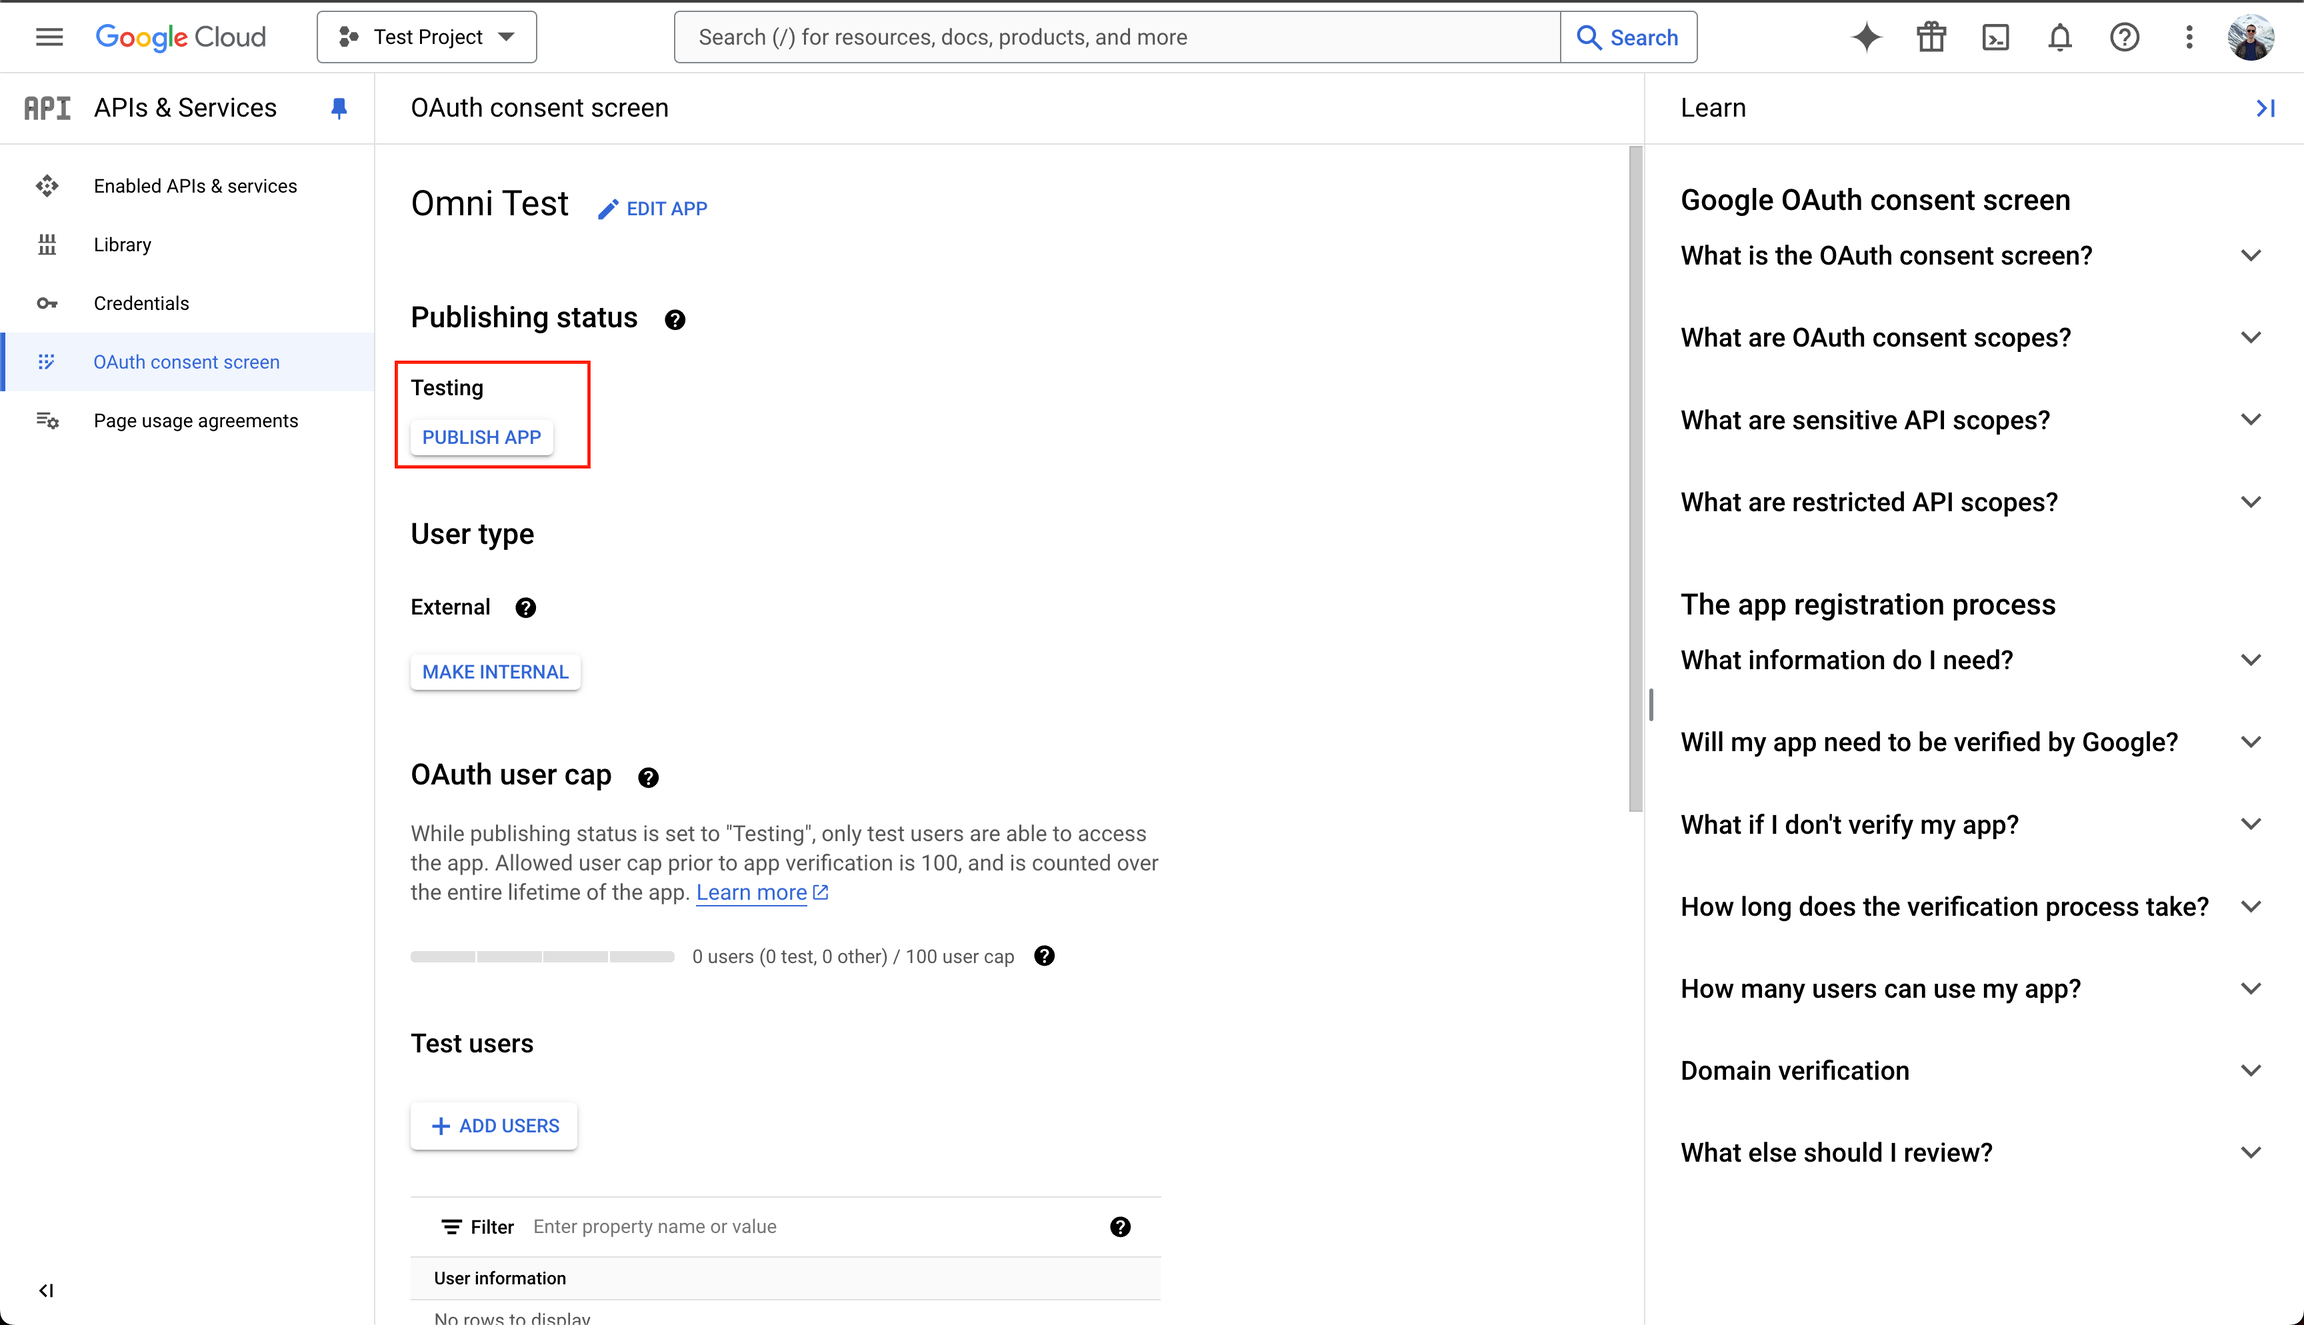
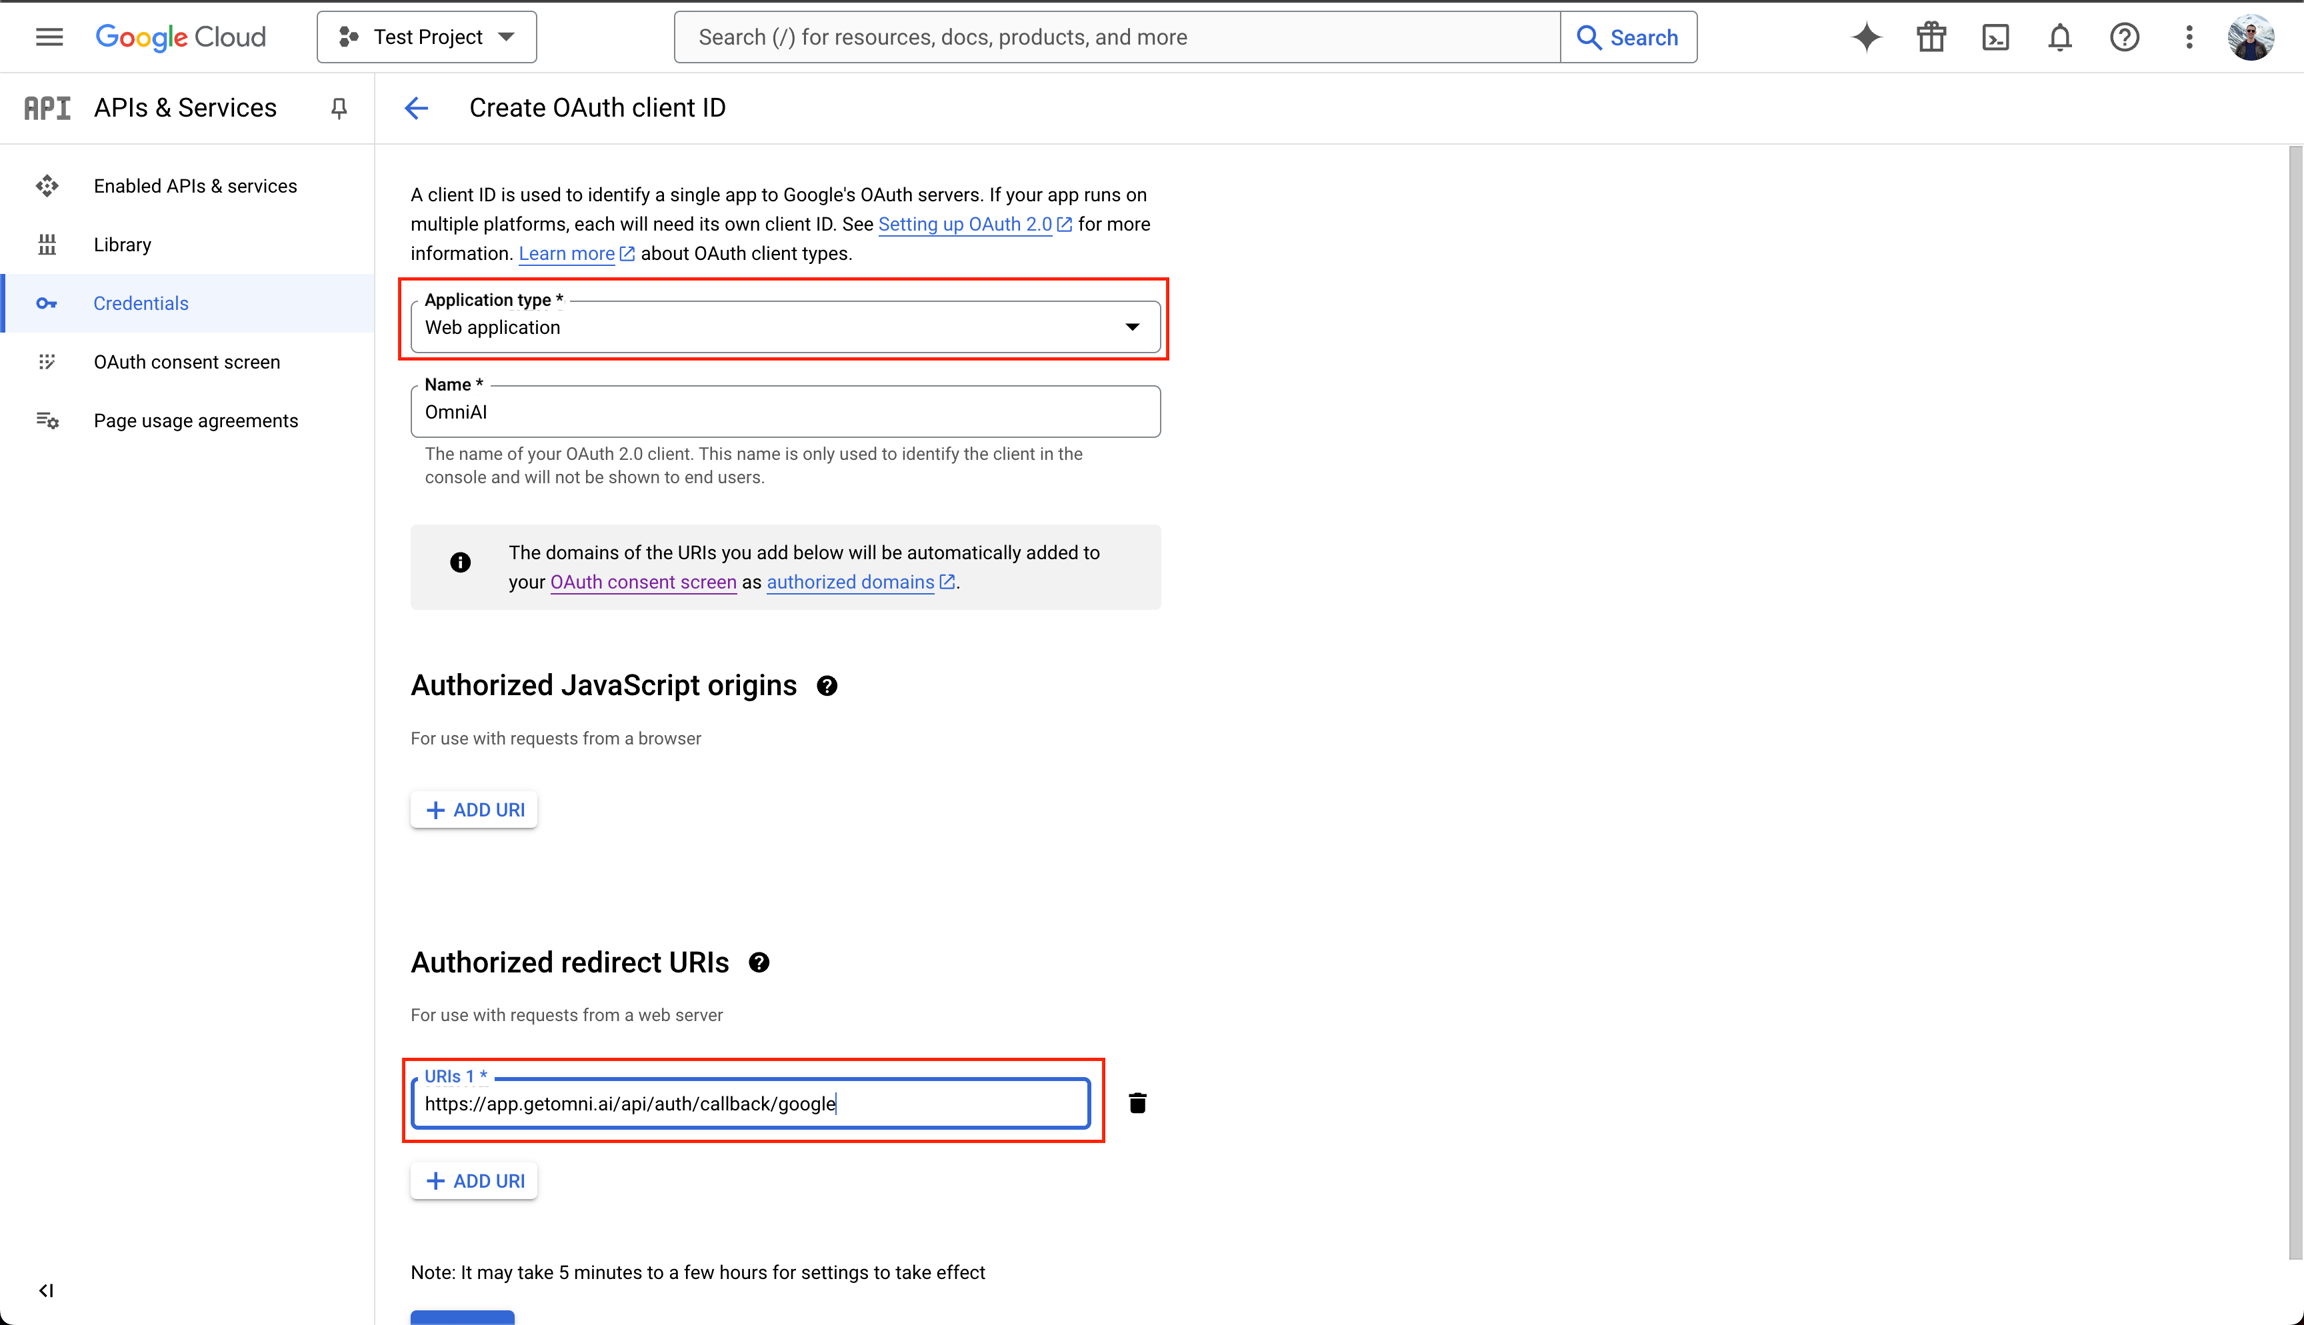
10. Creating an OAuth Client
Once you have a Google project created, you can selectOAuth Client ID again
https://[your url]/api/auth/callback/google as the redirect URL.
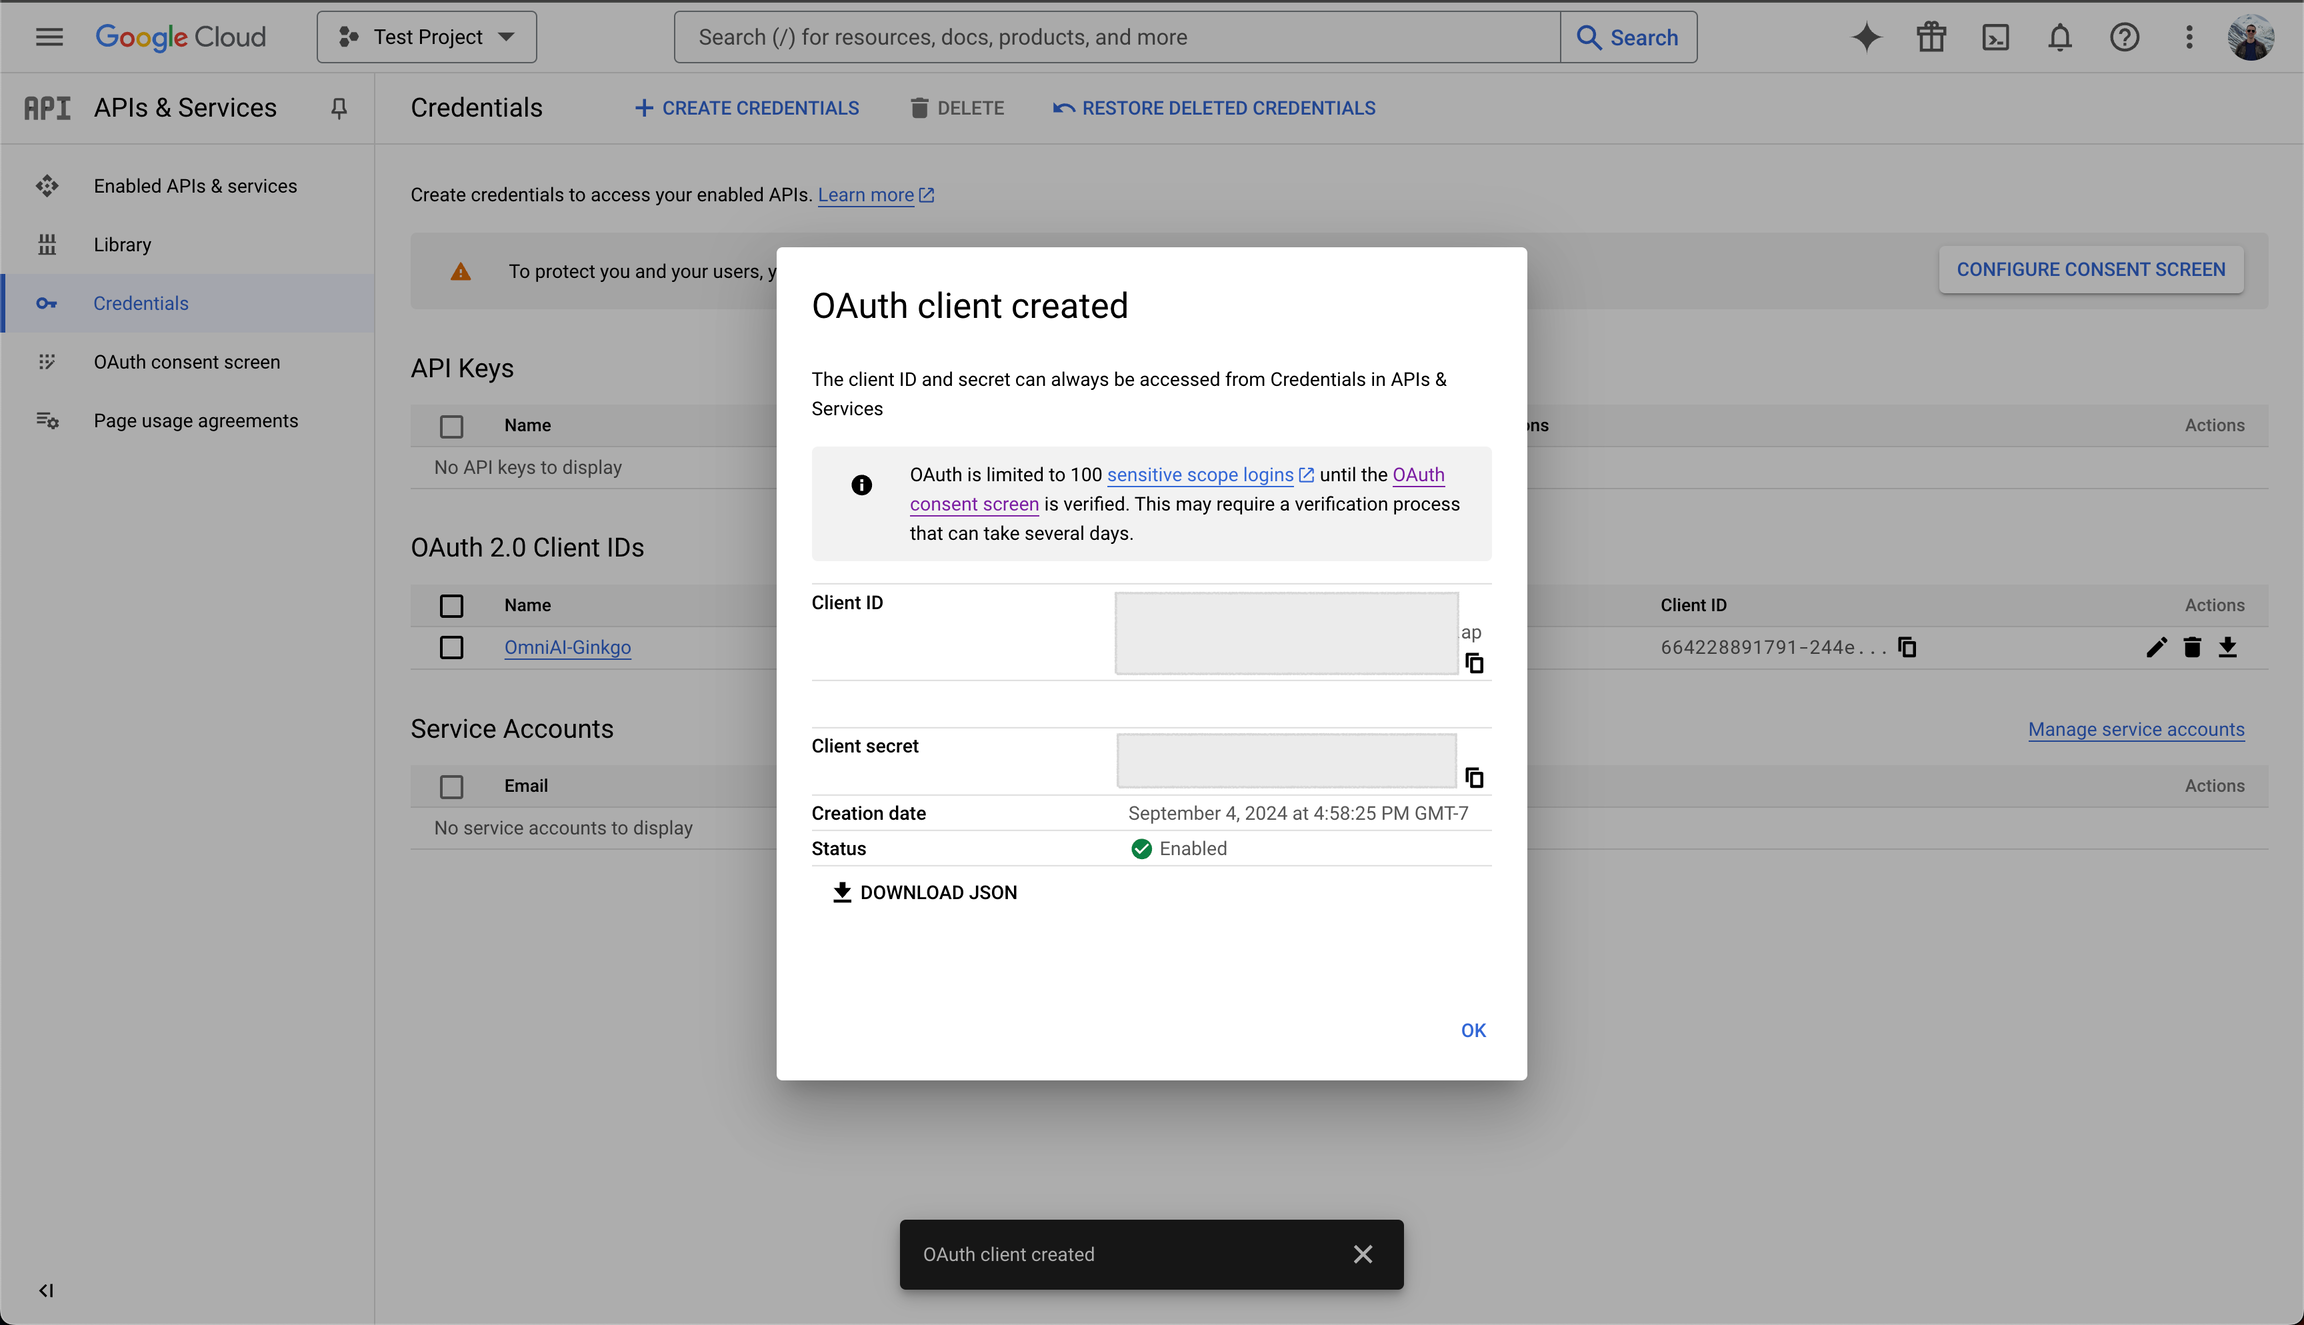
11. Save Client ID and Secret
Once created, save down the Client ID and Secret.